Friday 26 August 2016

009 - Makeda2 vs. Kreoss1

I haven't been able to play much latelly, a crazy amount of work has put a real dent in my free time.. Anyways, I have a tournement coming up in a few Weeks! My first real one since starting Warmahordes. There's been a few smaller tournements at my gaming club here in Oslo, but it's been a much more casual enviroment. My placings haven't been all that great, but with my newfound greater understanding of the game and the Faction, i believe i could at least get a decent result.

But to do that i need to get as much practice in as possible! Makitties (trademark) will probably be my main drop, she just plays so good into a very wide variation of match ups, and is a real hard counter to pretty much every single problematic control caster out there (Wormwood, Coven, Haley2 etc.) So given my limited time to practice, i will probably dedicate most of my time to her. Starting with another control/assasination specialist. The dreaded Pop and drop! How will our first lady fare against the fanatic? Read on!

Lists:

My list:
Supreme Archdomina Makeda WB+24
 - Titan Gladiator - 14
 - Titan Sentry - 15
Tyrant Radheim - 9
Morthieurge Willbreaker - 4
Tyrant Commander and Standard - 6
min Paingiver Beasthandlers - 5
Max Praetorian Ferox - 21
Objective: Fuel Cache

His list:
High Exemplar Kreoss WJ+29
 - Hierophant - 3
 - Revenger - 10
 - Repenter - 8
 - Crusader - 10
 - Vanquisher - 17
Wrack -
Wrack - 1
The Covenant of Menoth - 4
Rhupert Carvolo, Piper of Ord - 4
Vassal Mechanik - 1
Exemplar Errant Seneschal - 4
Choir of Menoth max - 6
Daughters of the Flame - 10
Exemplar Errants max - 16
Knights Exemplar - 9

Pre Battle Thoughts and Deployment:

So, what do i have to be careful of? With all of his shooting and infantry, he can get of a great amount of attacks, meaning that he can potentially break through the Tough/Stay Death wall if i allow him to get to a lot of my models at once. I would have to try and limit him a bit, maybe trying to hem him in a bit. His Feat does pretty much nothing against me as pretty much everything is Steady, and Makeda can even stand so far back that she might be outside of Feat unless he really expose Kreoss,
 My main goal was to go for Atrition, with the possibility of Scenario if the opening presented itself. With this list Atrition is often the way to go i believe. The list grinds exeptionally well, And if i play fast enough i can put a real time pressure on my opponent as well, all the angles the Ferox creates, and the time it takes to try and remove them takes a lot of time from the opponent.

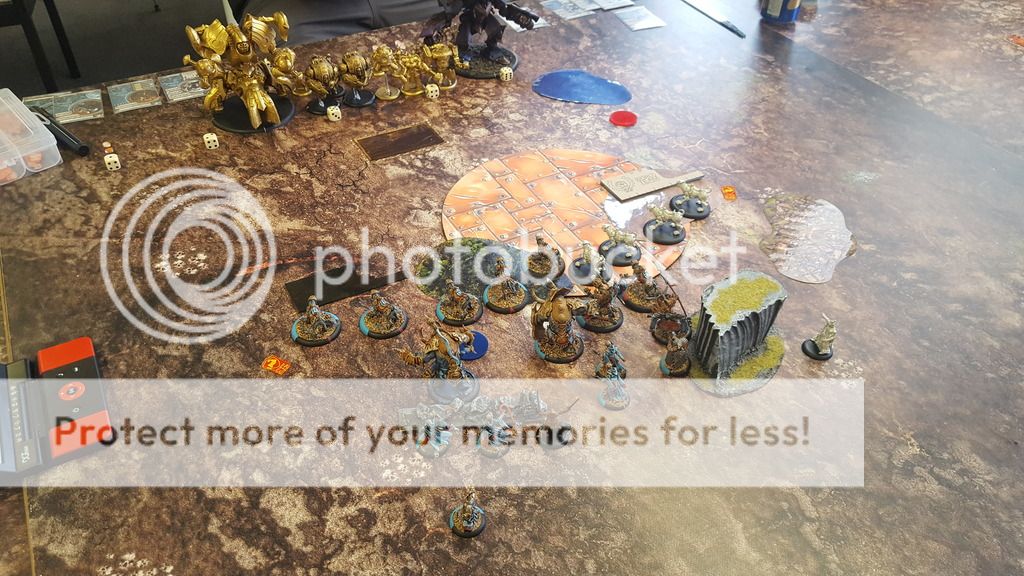
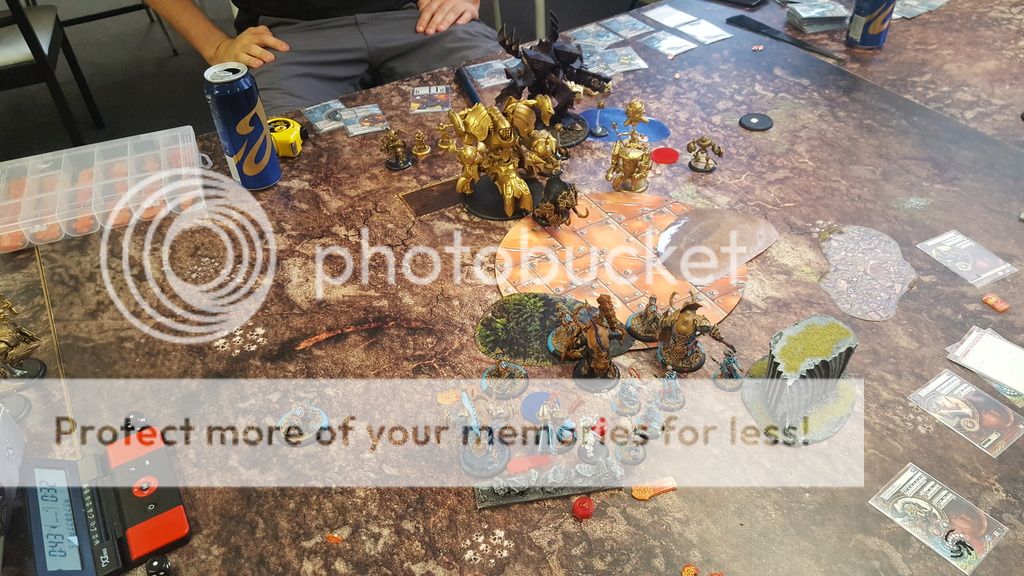
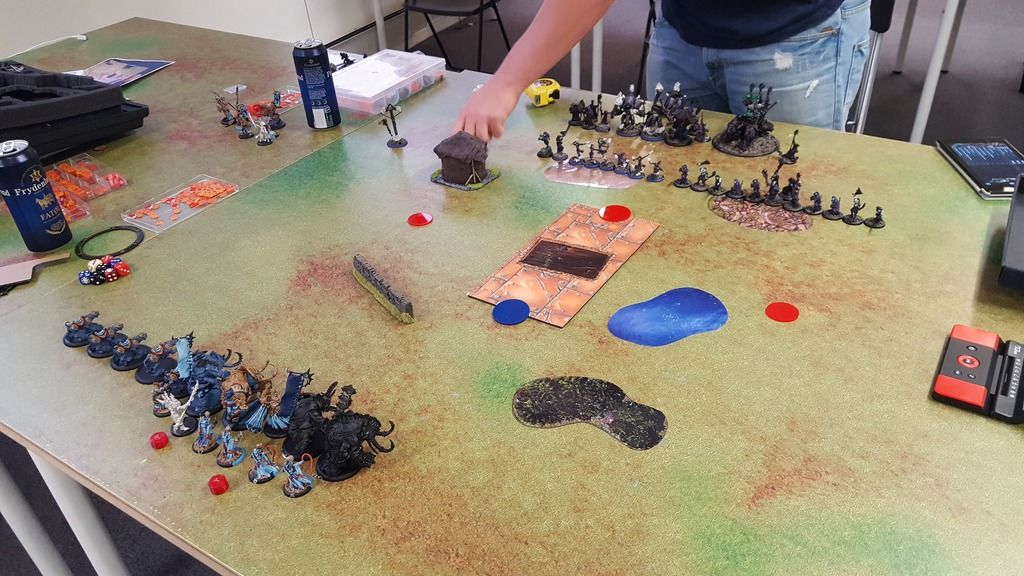
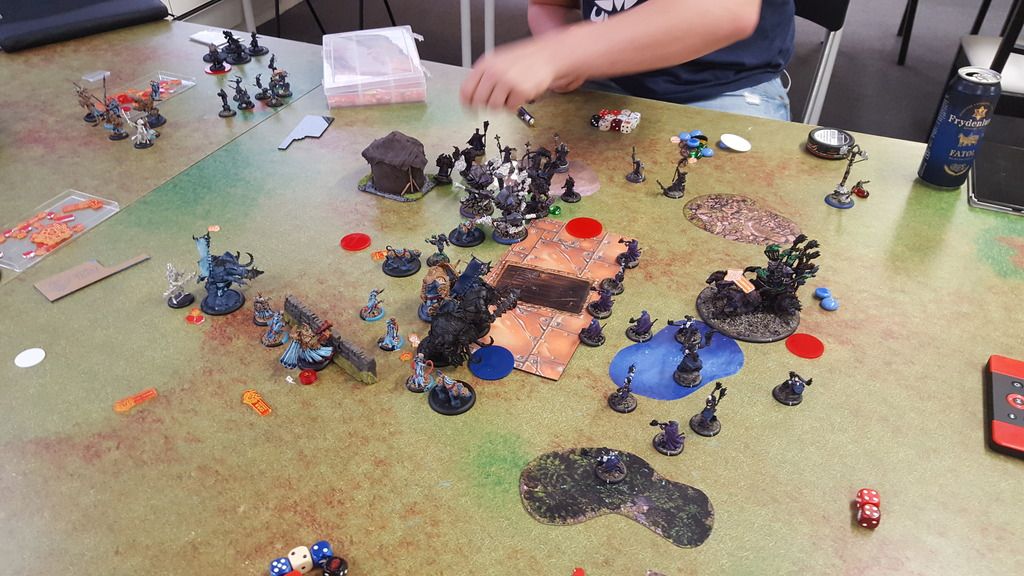
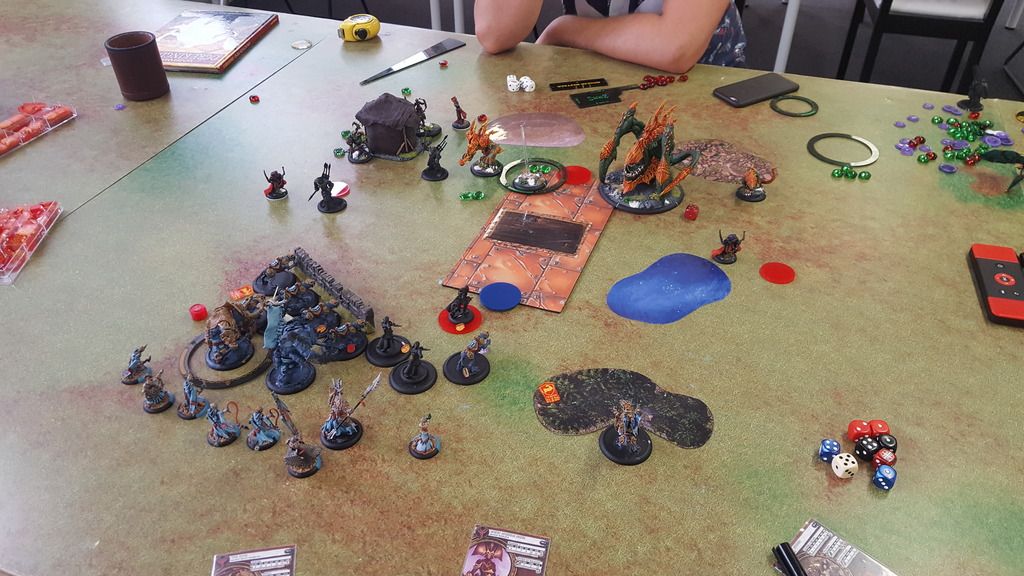
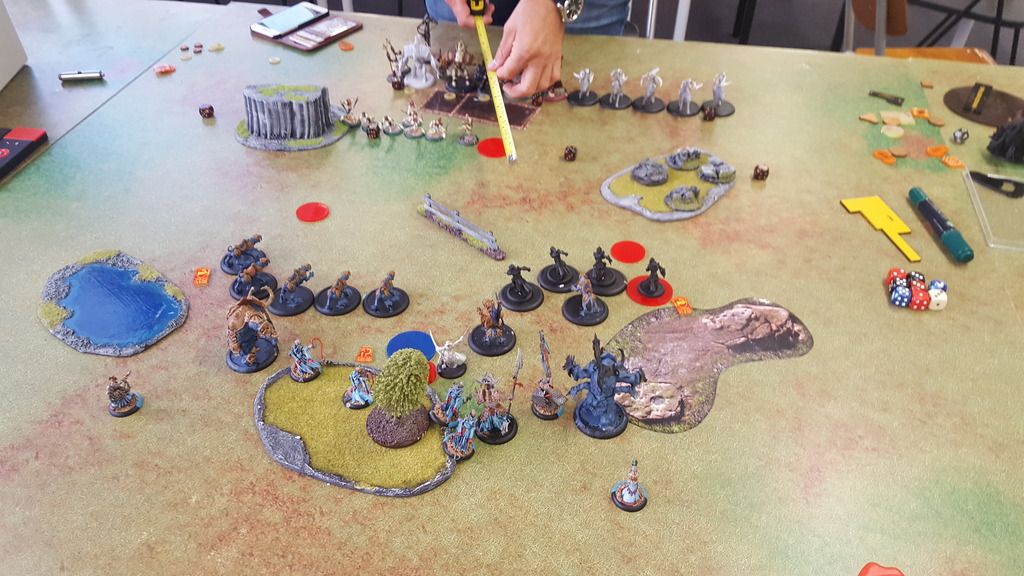
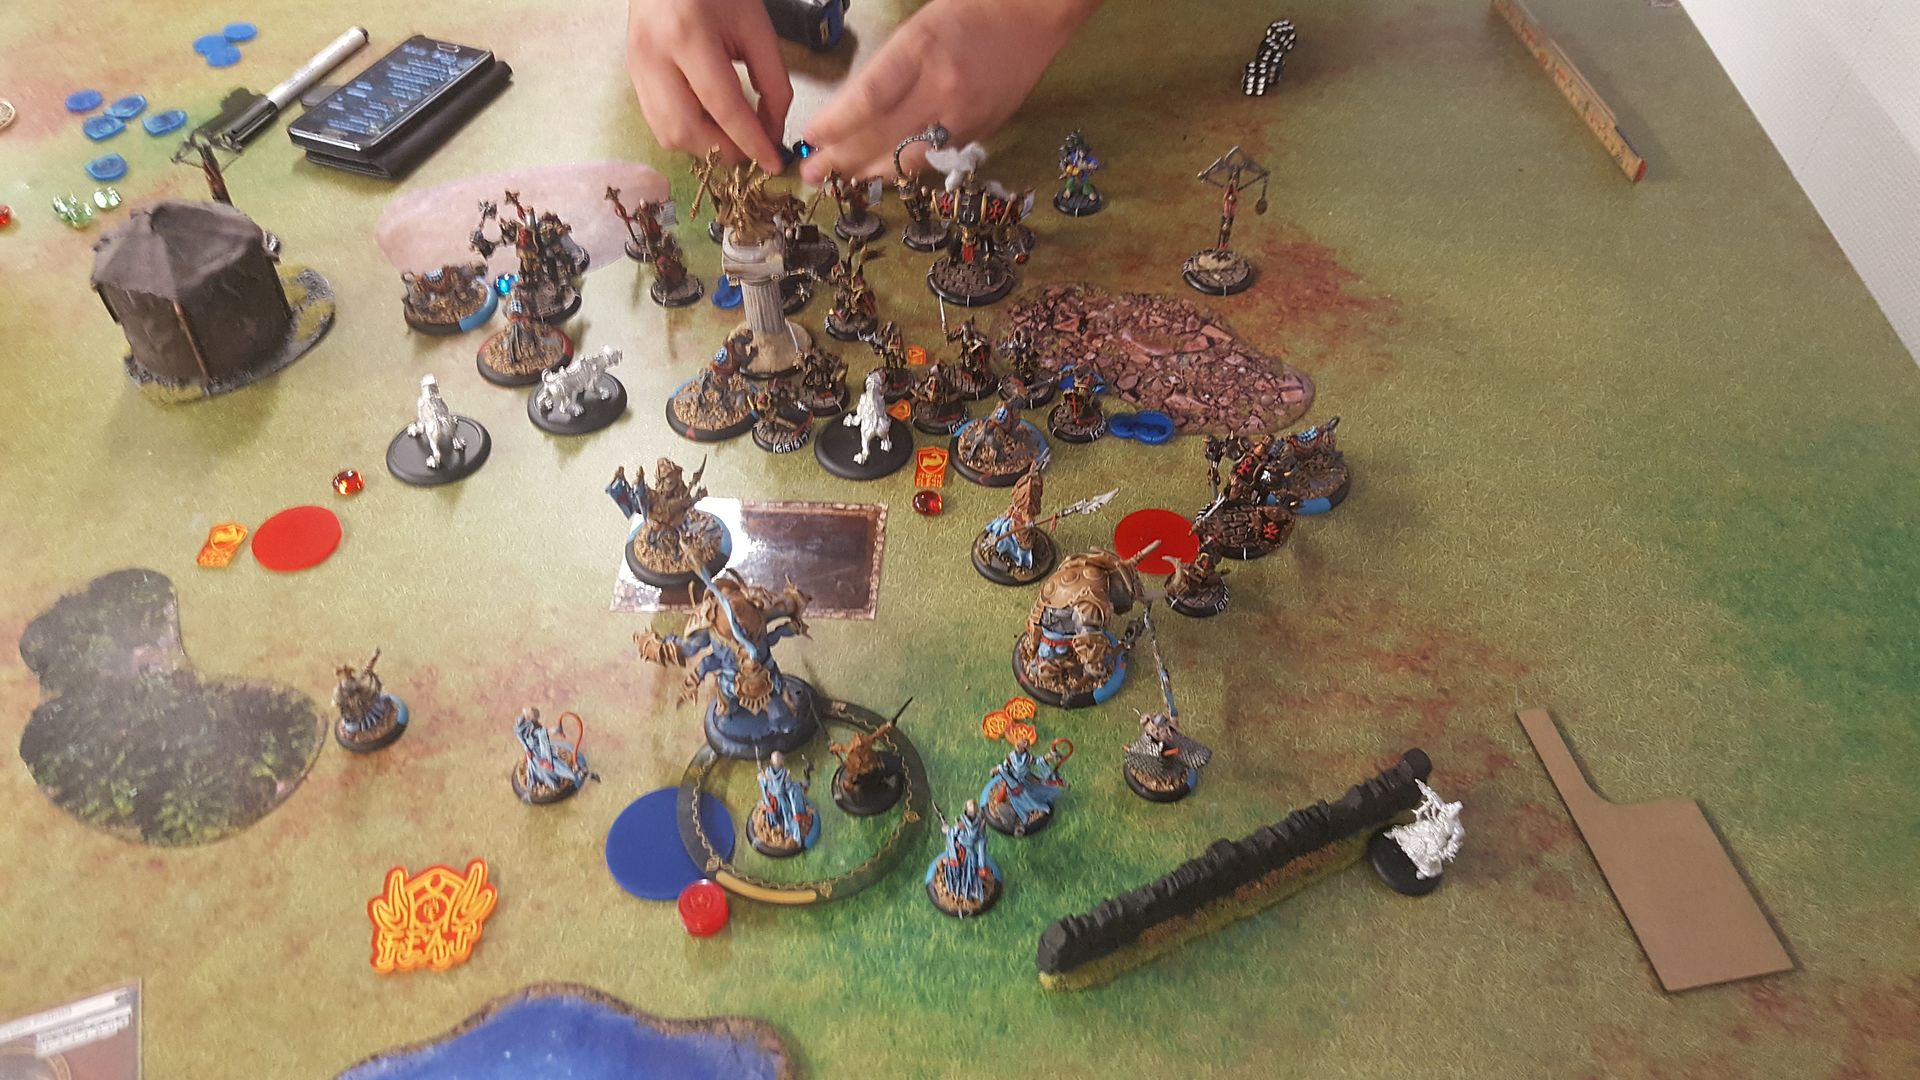
The scnario was Extraction and i got to go first! I Deployed in my usaual central position with Ferox on either flank. The extreme speed of the cats means that i can easily shift from one flank to the other if the need arises. Protectorate deploys centraly as well, The AD elements directly in front of the rest. Game on!


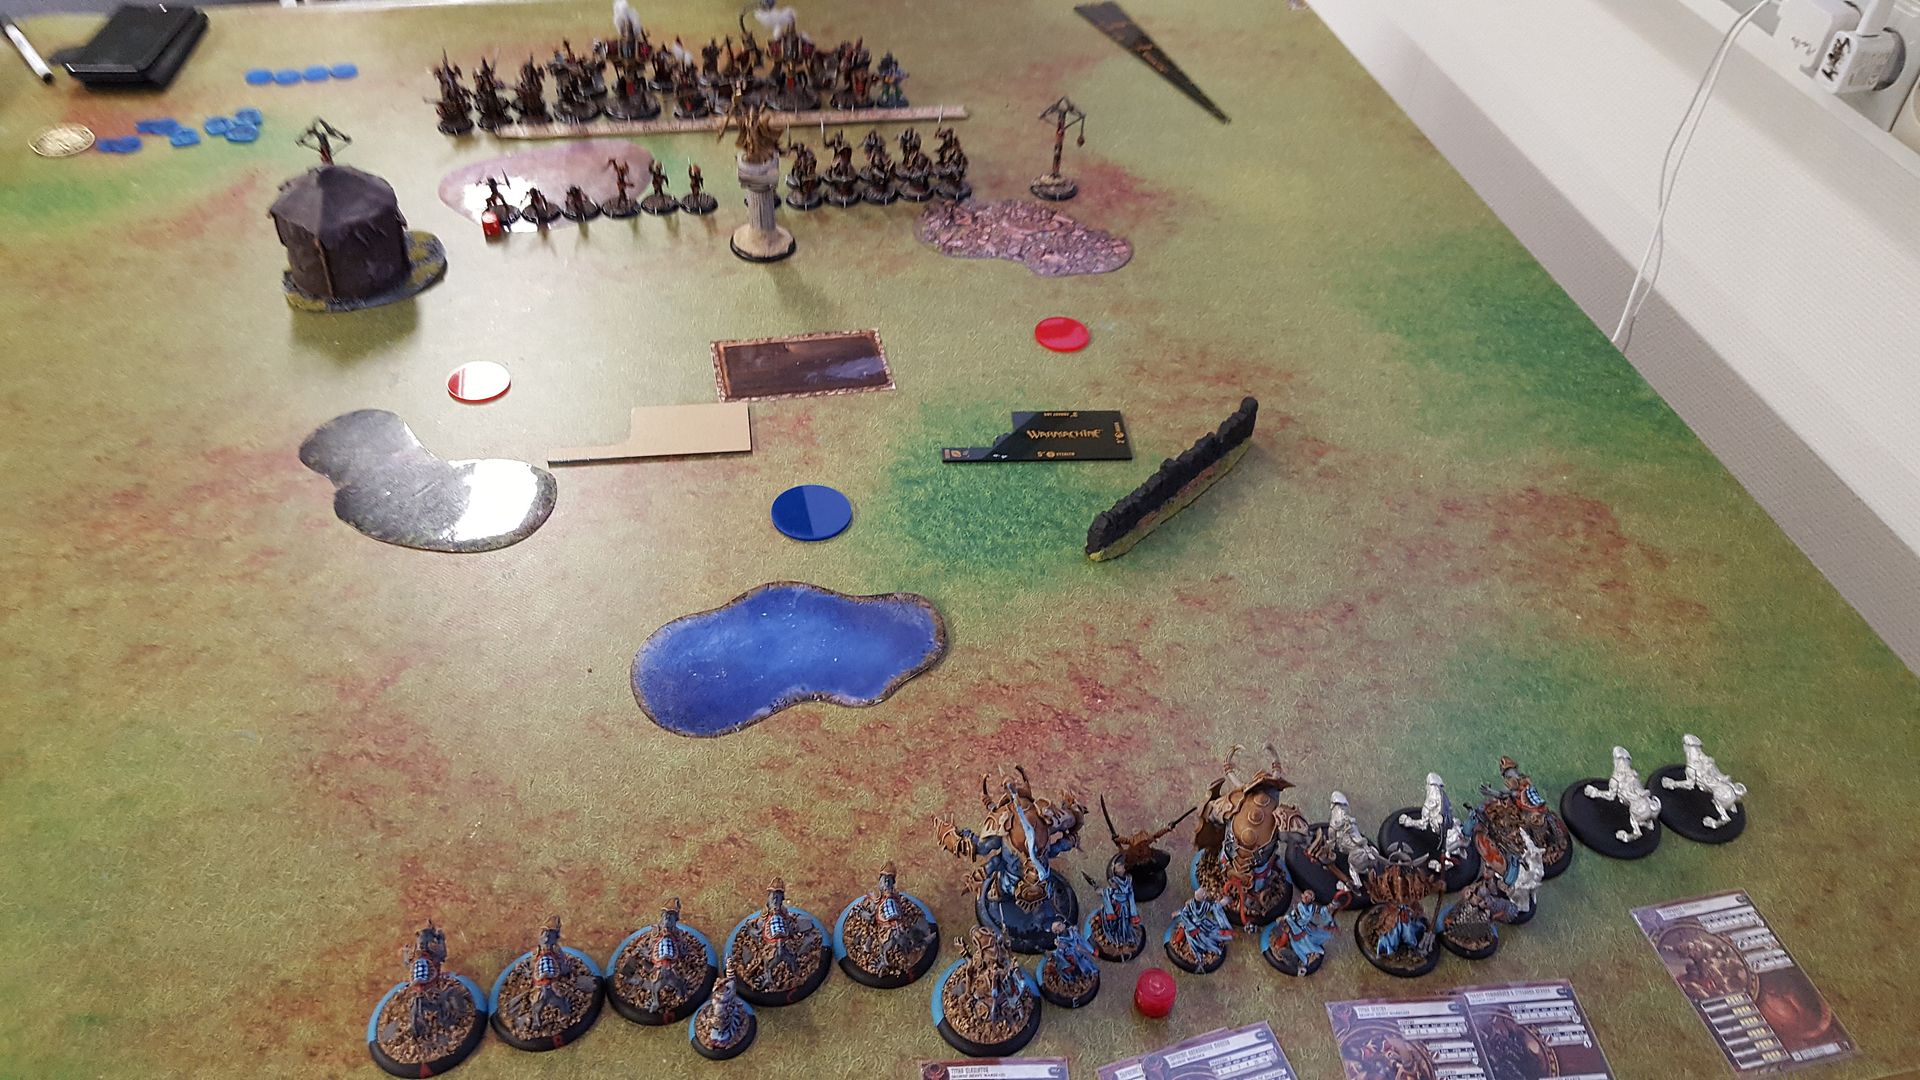
The central positioning of my opponent means that there's harder for me to force my way on Scenario. If he had skewed to either side, i could move to the opposite one with makeda and block him out with a wall of Ferox. I know that Errants can be a real pain to remove (Self Sacrifice can be a real pain, and Defenders ward doesn't make the job any easier.) Three of his Jacks is standing behind them as well, so if i can make a frontline and jam them up early, i could create a real traffic jam, making it much harder for him to get them into play.
Plan made i Rush both Beasts and run everything up pretty much as far as possible. Note how i use the measurement tools to mark his charge threats in the picture below. Premeasuring is an incredibly useful tool to have, and you should really use it to your advantage, Marking planned moves with proxy bases and checking if all your plans are possible before moving! It removes most of the problem of realising halfway through a turn that the things that you had planned is impossible.


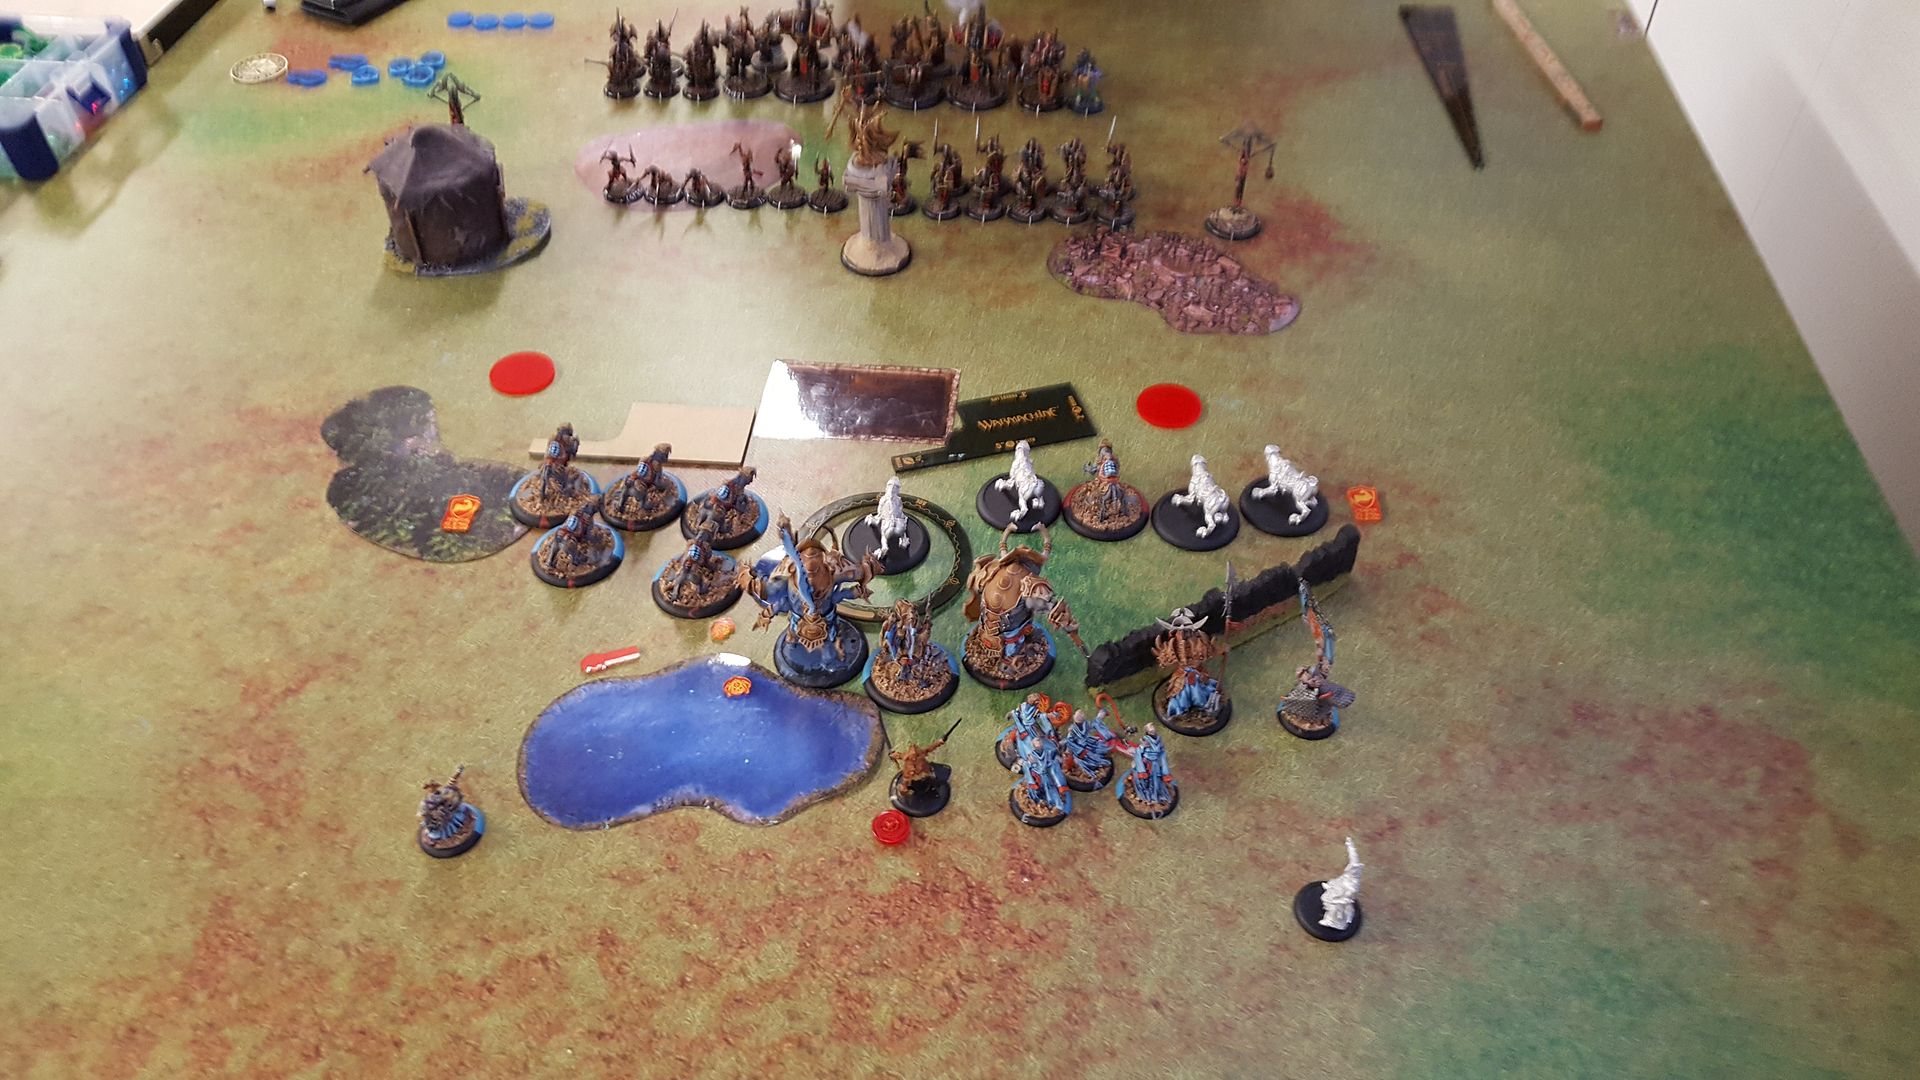
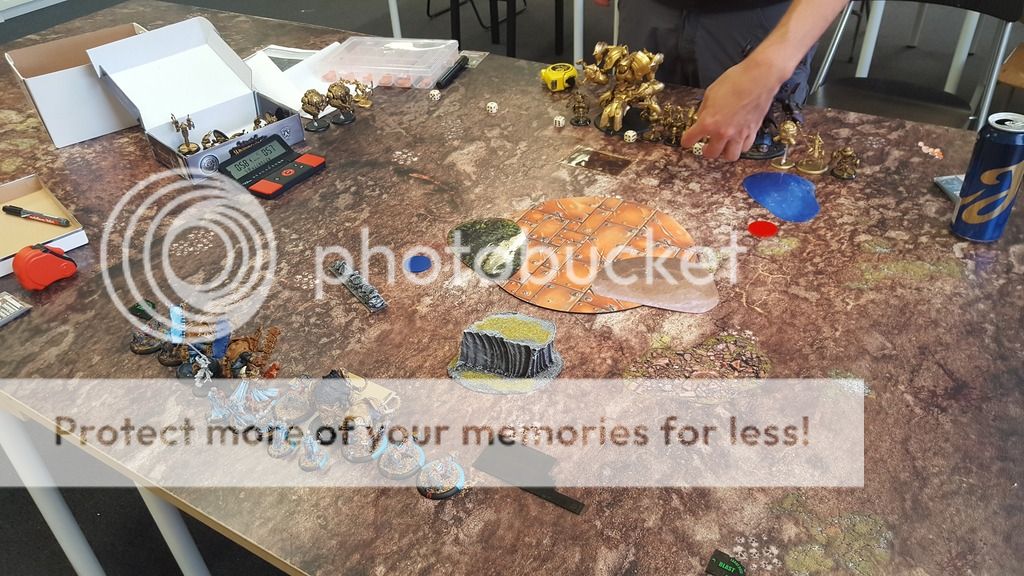
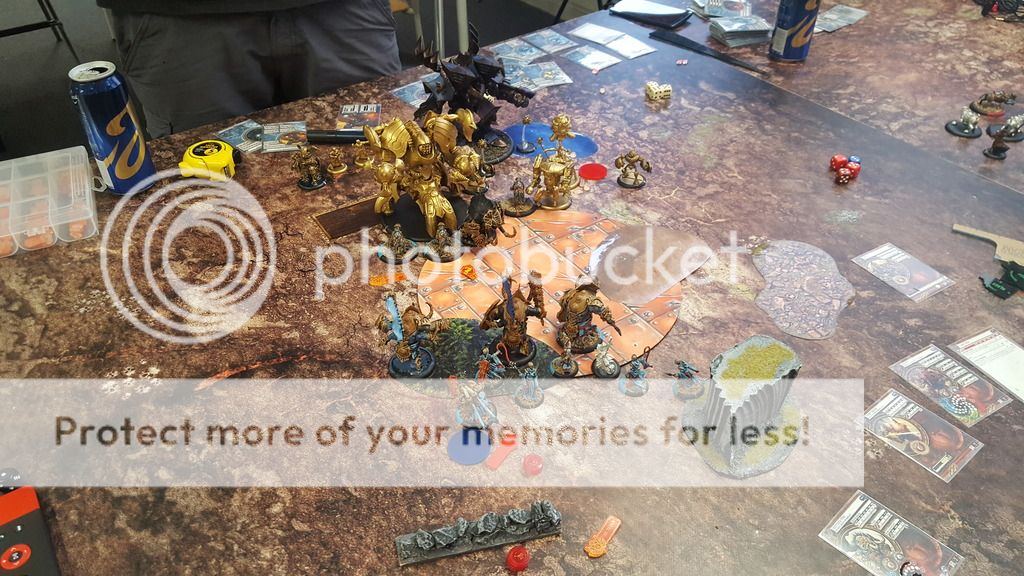
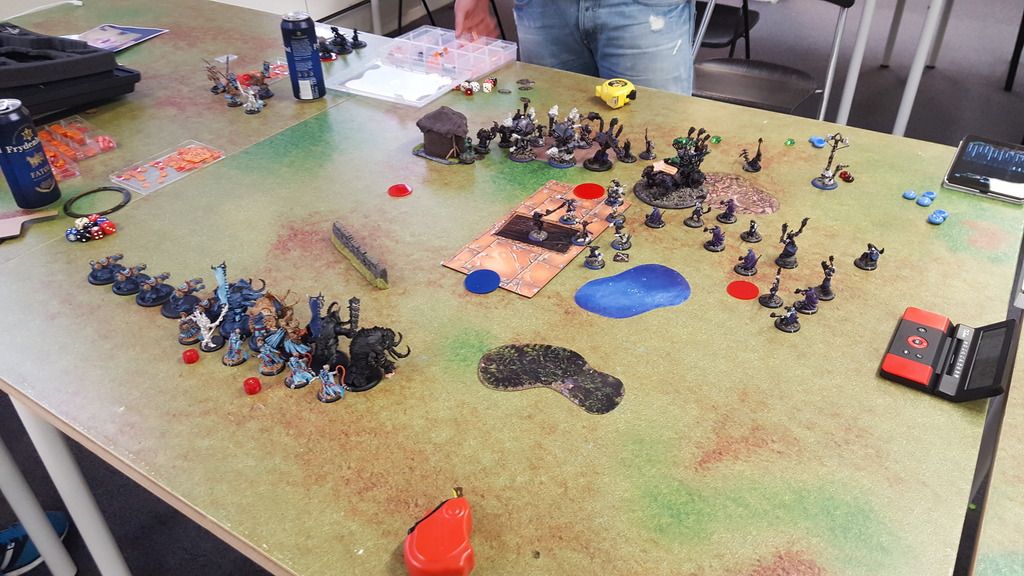
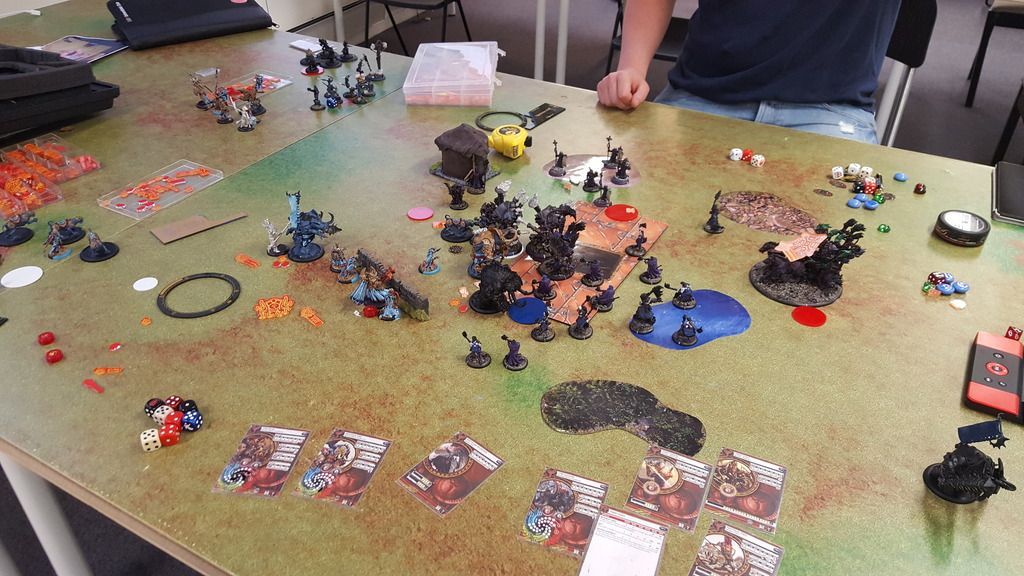
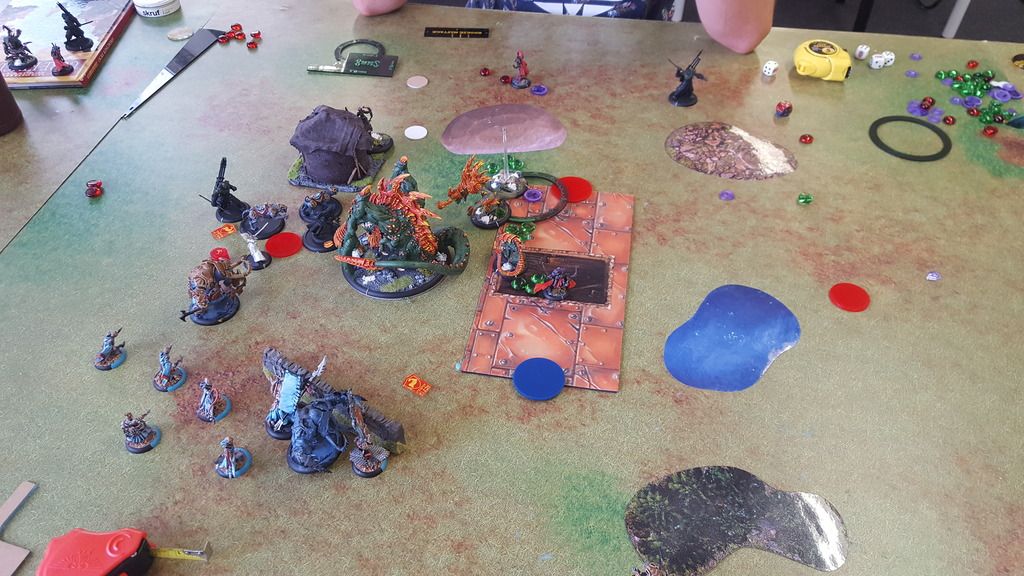
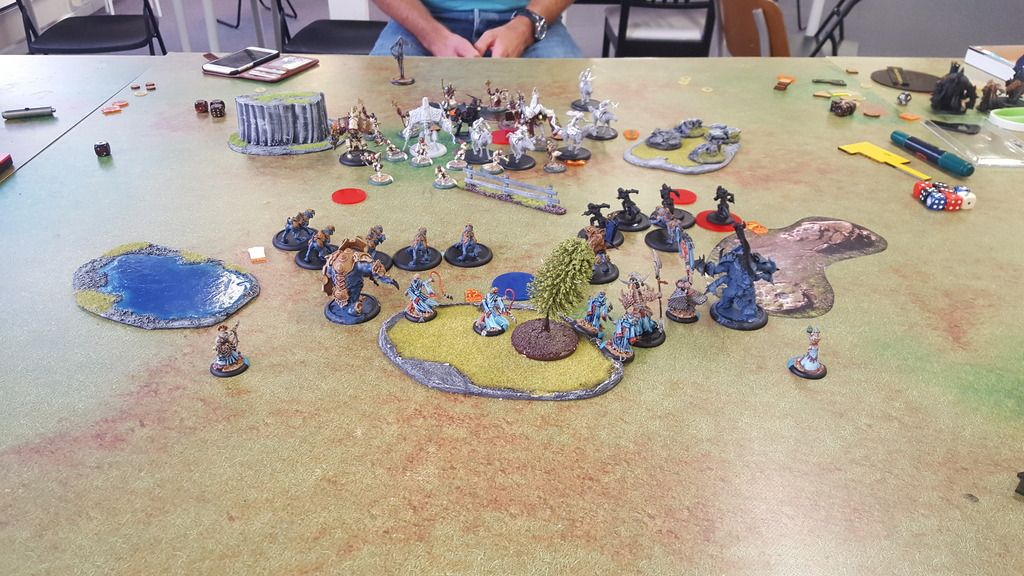
Protectorate moves up. He realize that there's pretty much nothing he can do about my threat ranges anyway, so why hang back? Daughters run to Jam left Ferox, Errants shoots and kill one Ferox on the right ( i only had enough Fury for 2 Stay death as i rushed both Beasts last turn (Probably wasn't necessary in hindsight))


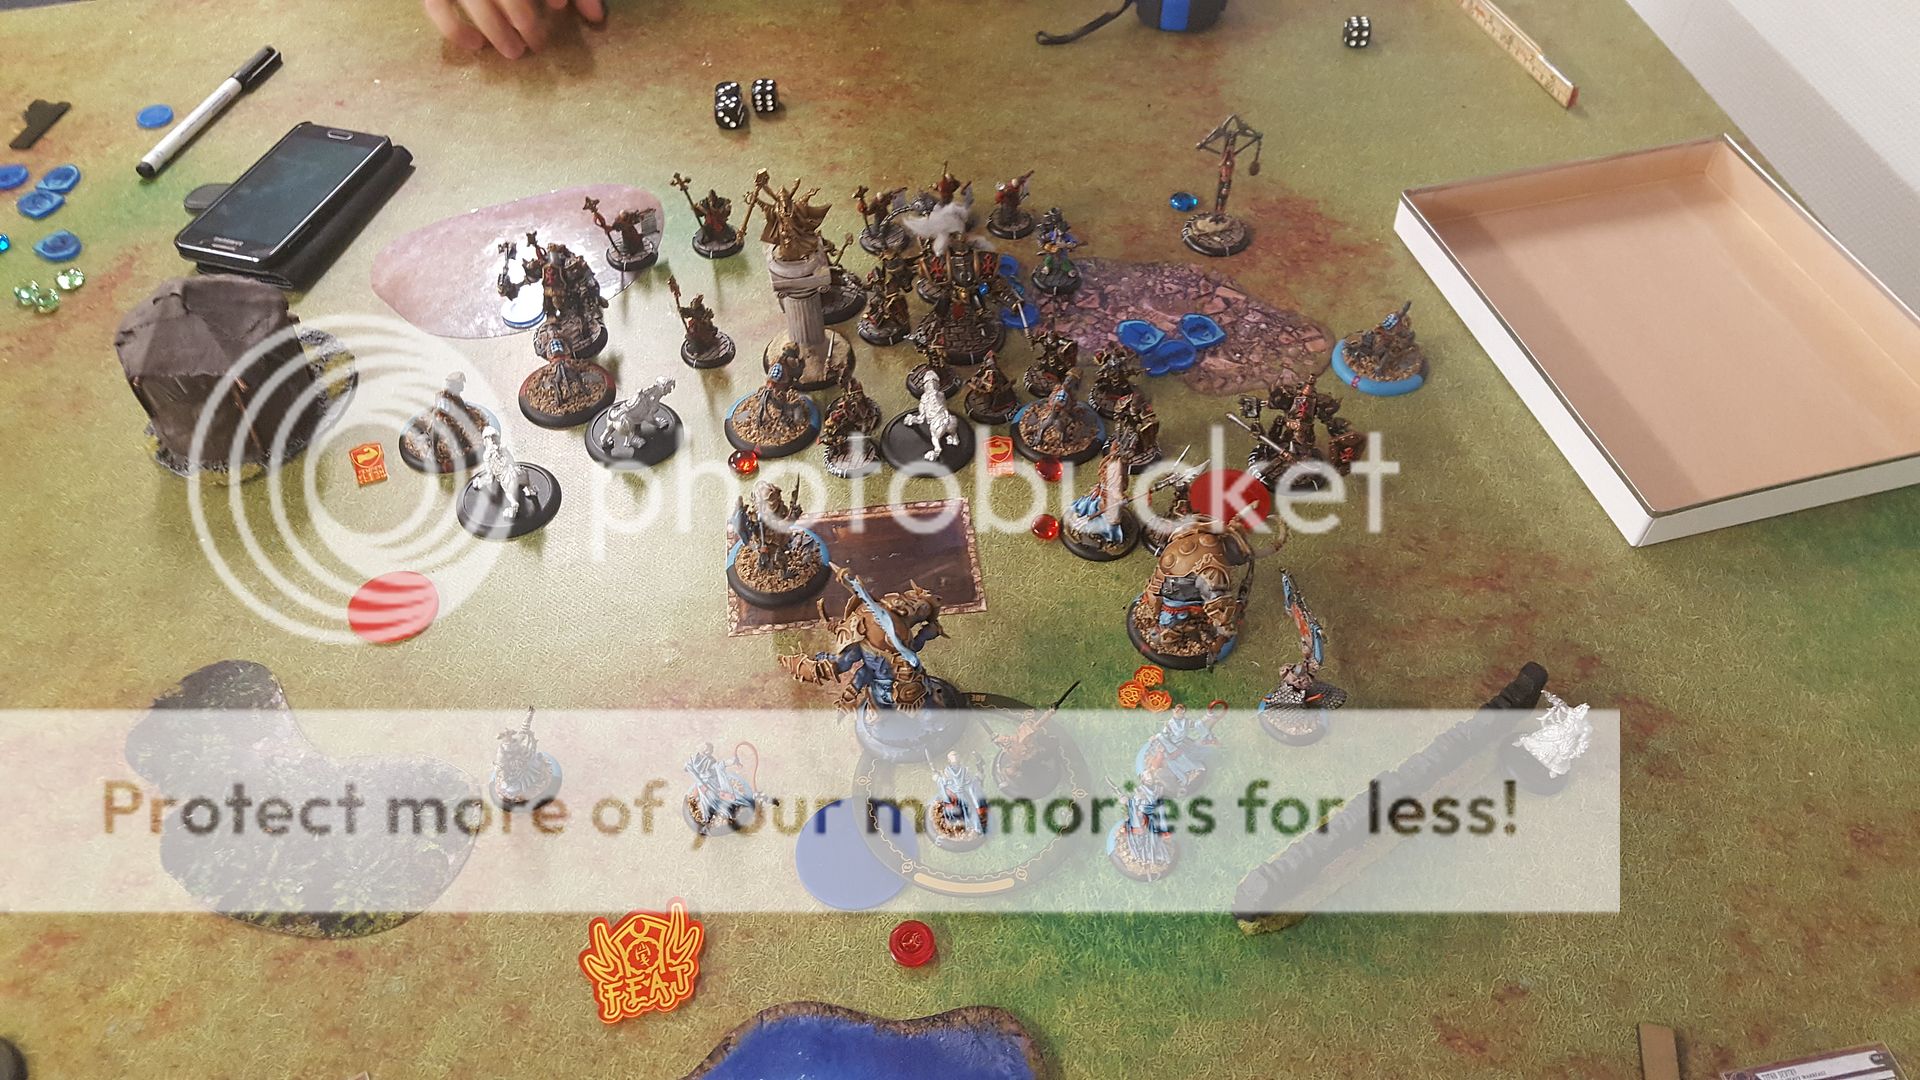
Kreoss is standing pretty much in the open behind the objective (The big statue of Sevvy) And within 16,5' of Radheim, camping 0 Focus. I could go for the assasination here, but there's really no point. True, he did kill a Ferox, but i should have little to no problems with dealing with his Jammers and keep up the plan of hemming him in on his Left flank. Radheim and Gladiator kills a couple of Jammers, The Right Ferox finish the job. Left Ferox runs forward to kill all Knights exemplar, denting the Crusader a bit and Jam. The rest moves up a bit, the Standard Bearer helps with contesting the right flag.


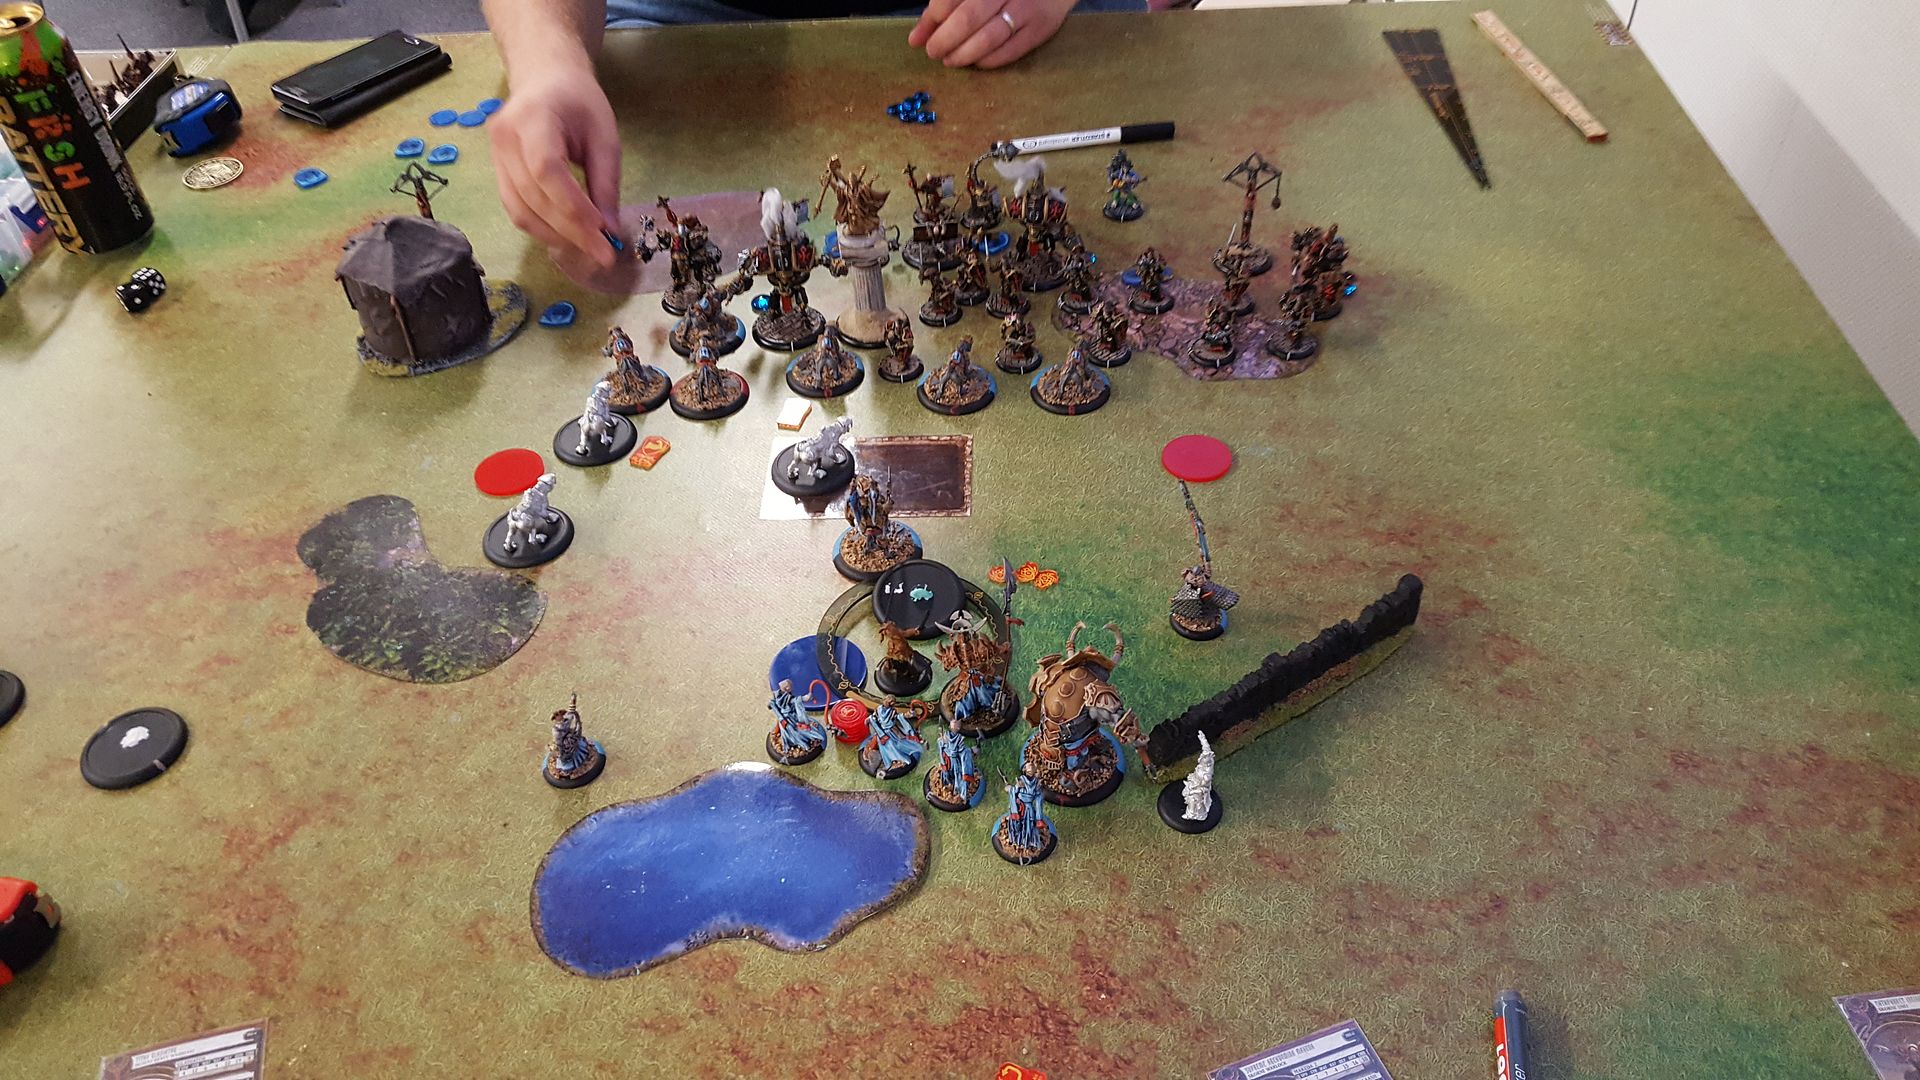
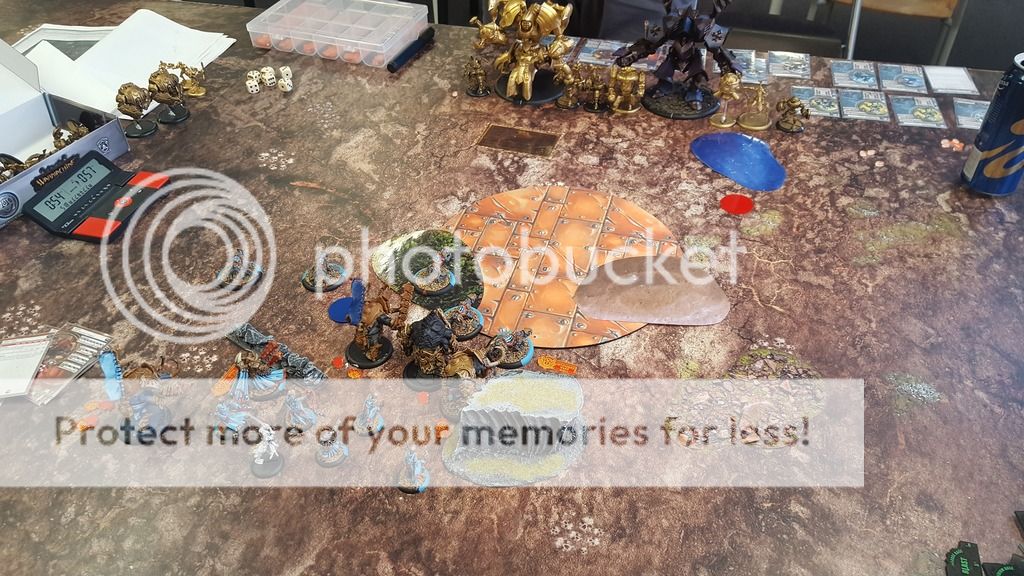
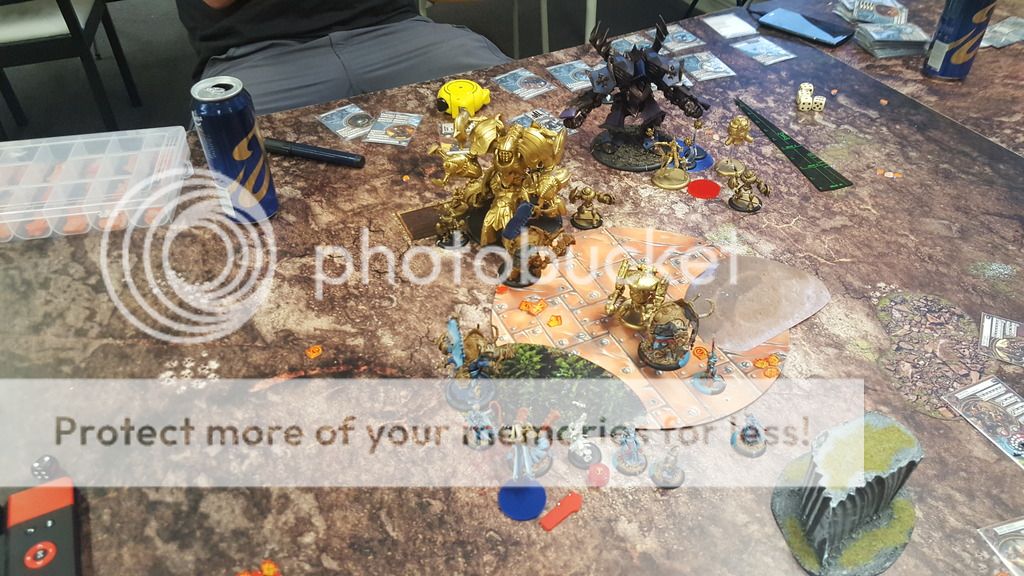
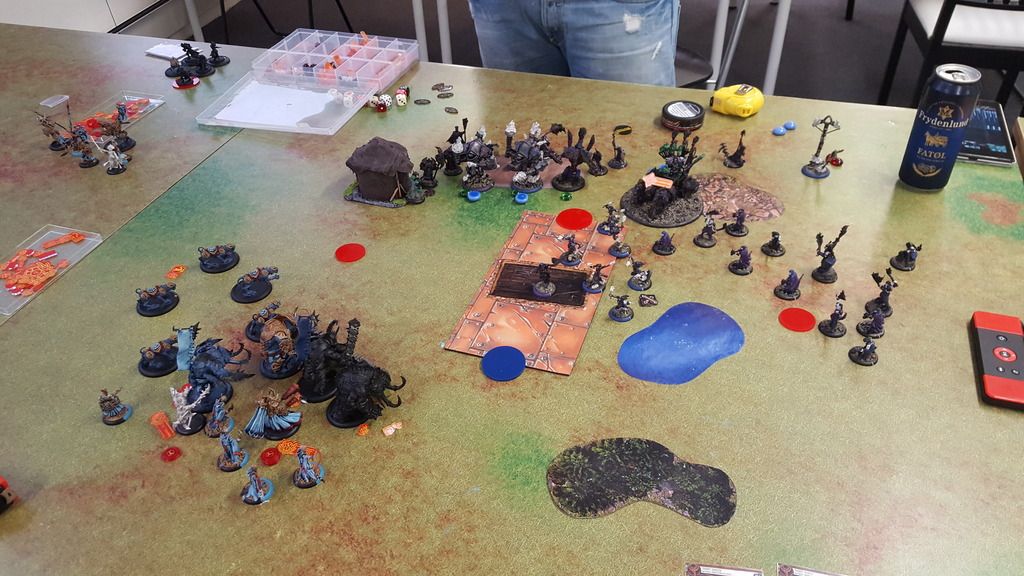
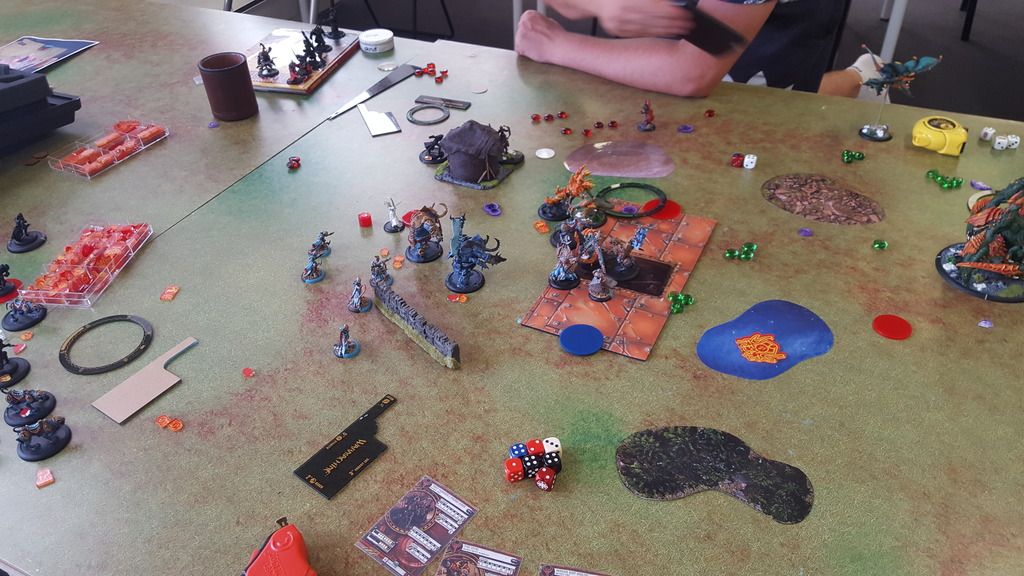
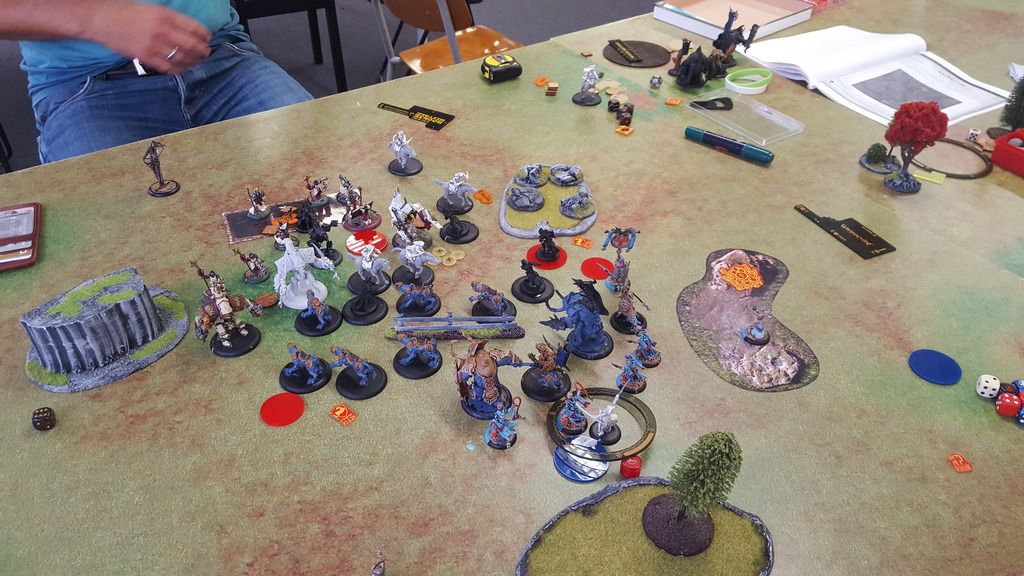
Kreoss decides to Feat, then remembers that i pretty much ignore it. The rest of his Army then proceed to do absolutely nothing to me. He even Jams himself up even further by cramming the Errants around a couple of Ferox that he fails to kill, and misses with a few attacks letting me dodge back. He manage to catch a few things on fire though, and one Ferox was outside of Stay Death and bit the dust after attacks from the Crusader.


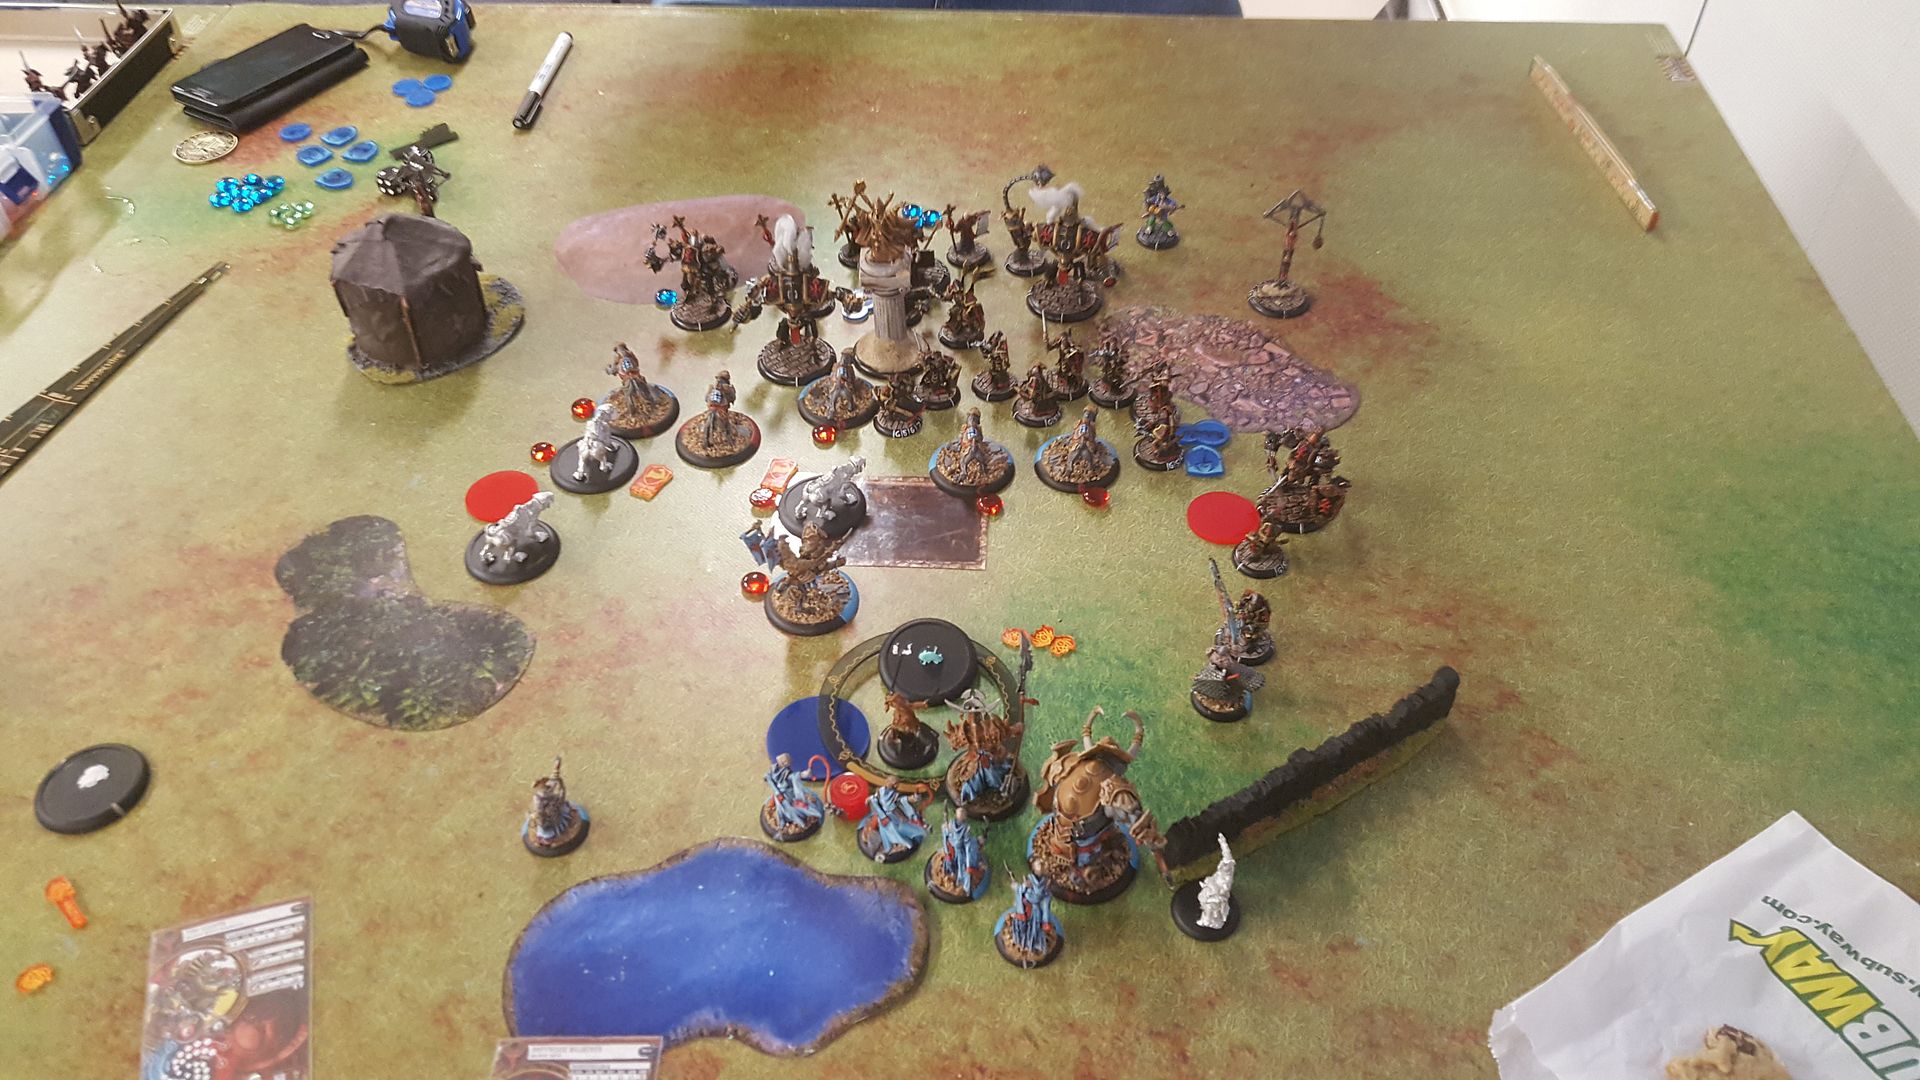
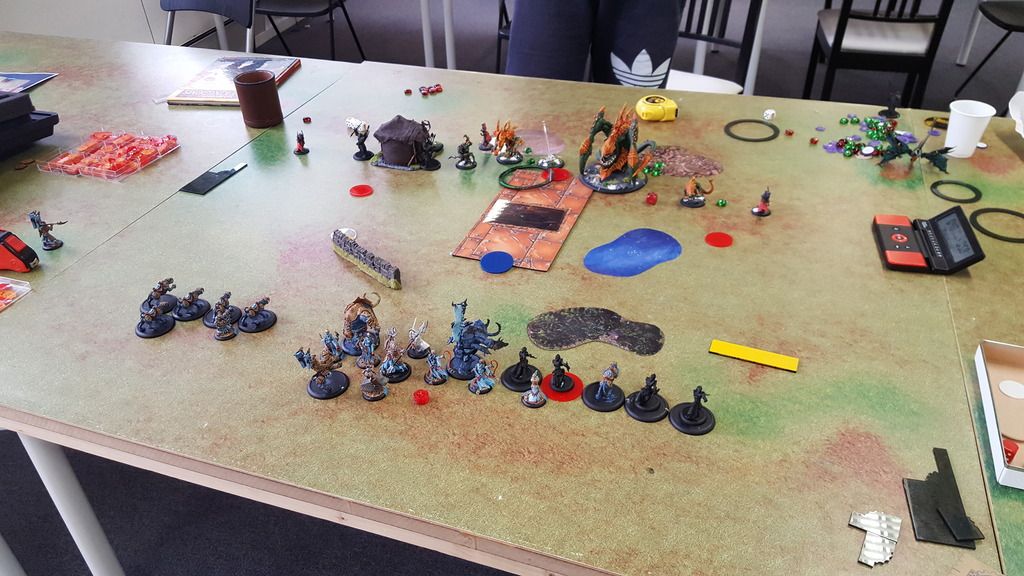
Due to him failing so completely in killing Ferox, Makeda still sits at full Fury, so the Gladiator have to take a Threshold check, and Fails! Knocking 9 boxes off Radheim. Luckilly the Continous fire on him wears off. The rest of the Ferox manages fine as well. Willbreakers remove the remaining fires when they hand out Tough. I decide to make my move. Ferox kills a few Errants, puts a few wounds into his Jacks and Jams. Radheim kills the Crusader, Tyrant cripples the right arm of the Revenger. I forget to move in to Score on the Left flag though.


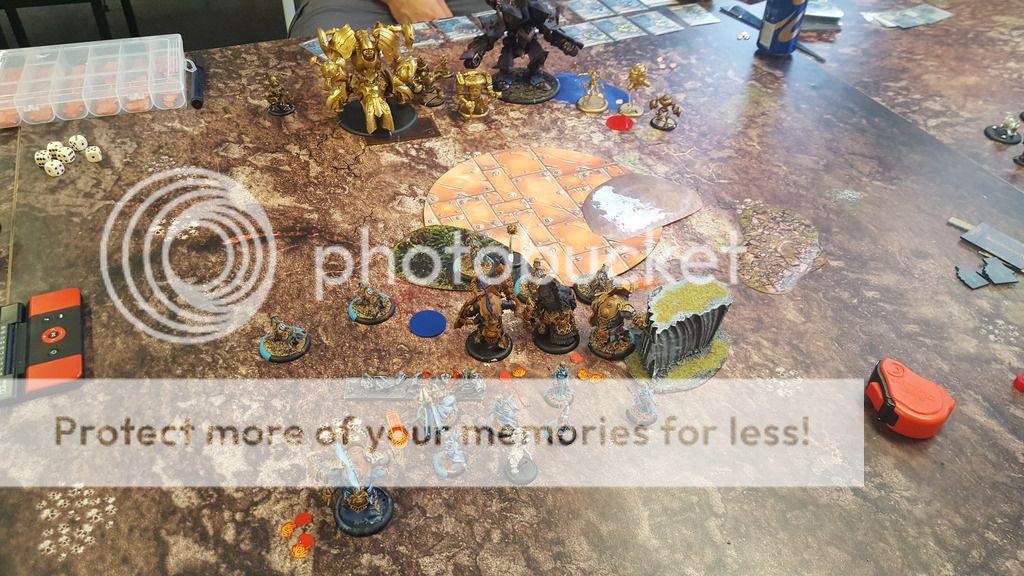
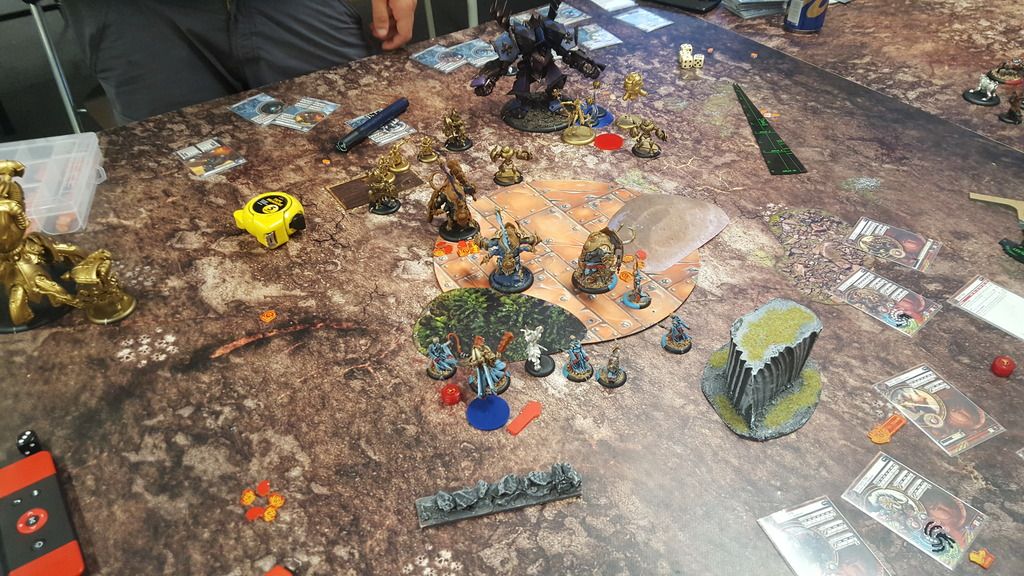
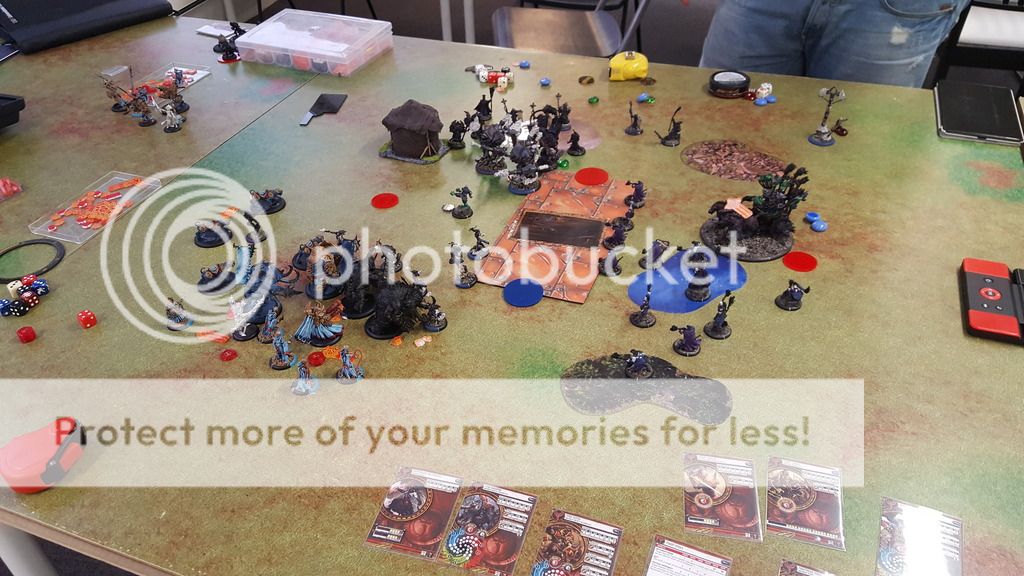
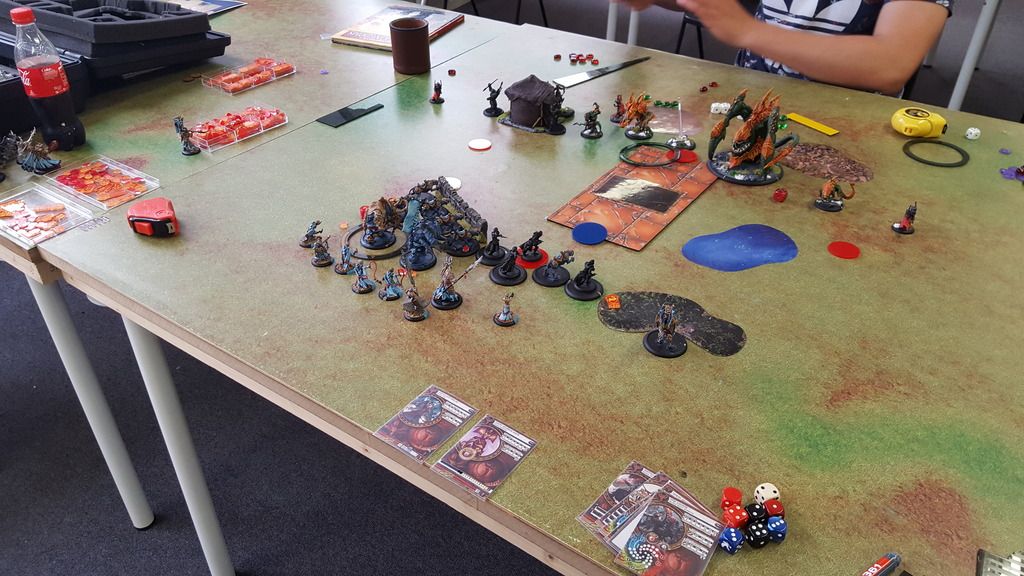
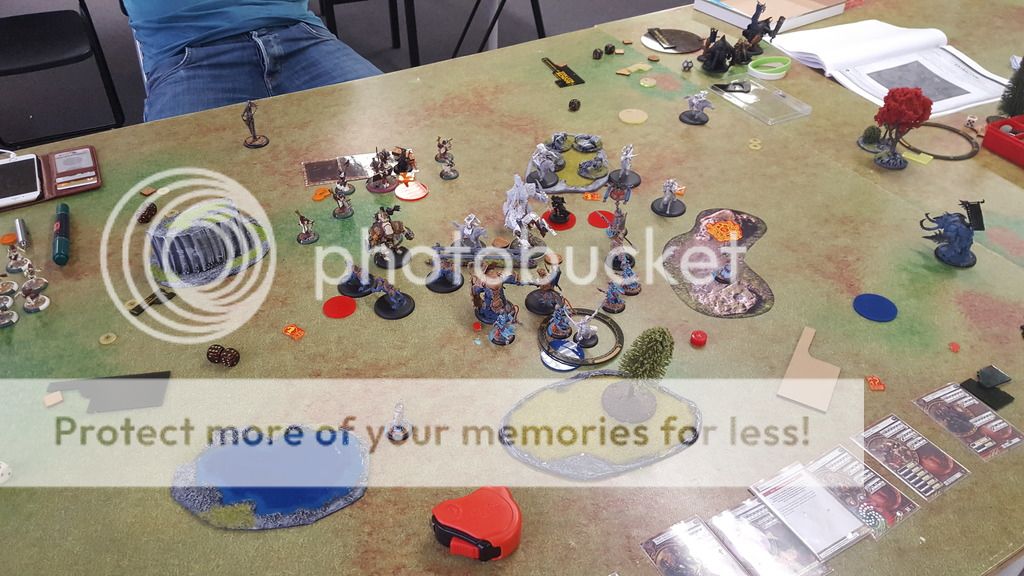
He tries to Unjam himself again, but his remaining infantry lacks the punch, and his Jacks are pretty much completely blocked from doing anything. He puts a few Cats on fire, but the damage is pretty much completely insignificant.


I kill both the Revenger and Repenter, All of the Errants, the Objective, and moves in to Score on both flags. Makeda is outside of any form of attack. Seeing this is a lost battle my opponent forfeits. (Forgot to take a picture after my last turn)


Victory to the Tyrants!

Post battle Thoughts:

My plan worked to perfection. With Daughters and Exemplar Knights out of the picture, that whole flank is mine to control, and his tight deployment meant that he blocked himself completely, making it next to impossible to launch a counter punch after my alpha. 
I really need to work on both playing faster, and the Fury management. Granted, he should have made me use some Fury on his devastatingly bad T2, but there was no need for me to risk having the Gladiator Frenzy. Losing Radheim that Early could have put a real stop to my plans as he is vital in scaring the enemy caster into positioning himself poorly in fear of assassination. This and the fact that he can clear half the boxes of a heavy, or nearly one shot a light with Storm Rager up makes him one of the strongest pieces in the entire list. He creates so much room for the other elements of the list by just being there, forcing the opponent to make tough choices and spend a lot of time trying to hide vital elements from him. 

Sunday 21 August 2016

008 - Xerxis1 vs. Father Lucant

Managed to get a quick game today against Convergence! There's not many Convergence players around here, so i have to grab the chance when it presents itself. What this also means is that when i do get the chance to play against them, i generally have no idea what they do.

We first intended to try Axis against my Mak2 list. He had two Batle engines and a bunch of Jacks, But when i got to go first and the table looked like this after my T1:


We quickly decided it was no point in continuing. I'm outside all of his threat ranges, and he literally can't move forward without losing both battle engines and probably at least one Jack to my Alpha.

So instead he switched to his trusty Lucant list, and i switched to Xerxis as i believe he is much better suited to handle the ARM skew.

Lists:

My list
Tyrant Xerxis WB+28
 - Tiberion - 22
 - Bronzeback Titan - 18
 - Titan Sentry - 15
Tyrant Zaadesh - 4 (Proxied with Hexeris1)
 - Titan Gladiator - 14
Mortitheurge Willbreaker - 4
Pangiver beasthandlers min - 5
Max Praetorian Ferox - 21

His List:
Father Lucant, The Divinity Architect WJ+28
 - Prime Axiom - 38
 - Inverter - 15
 - Corollary - 6
 - Galvanizer - 5
 - Galvanizer - 5
 - Galvanizer - 5
 - Diffuser - 6
Transfinitie Emergence Projector - 19
 - Permutation Servitors - 0
Optifex Directive - 4

Pre Battle Thoughts and Deployment:

So, how to deal with this. The main reason why i think Makeda is a bad drop into this is the ARM skew. Especially on the FEAT turn, but even without it, she just does not have what it takes to deal with the Prime Axiom. The cats barelly make a dent in it, and it out-threats both of my beasts thanks to Hunters mark from the Diffuser. And with the three Galvanizer with Grievous Wounds access, he can potentially clear out any cats i send out to block him. It's not impossible, but it could be really hard to deal with, depending on the Scenario.
Xerxis is a whole other matter. With his Feat and Stir the Blood ability, even the Cats can put a serious dent in the Prime Axiom. ( Each of them dealing 6-7 damage on average against Prime Axiom under Lucant Feat!). He still outthreats my beasts, but as long as i can negate him the heavy alpha, i am confident i can crack him on my own Feat turn. We played the Pit, and i won the Roll-off, choosing to go first.
I Skewed heavilly to the Left. The Forest blocking his view of my flag would mean that Xerxis could stand there perfectly safe and score while the rest of my army kept his at bay.
He deployed the Prime Axiom directly opposite my flag, and the rest of his army fairly central. Lucant were poised to go for his own flag. Game on!

Judicator plays the part of the TEP, he proxied some Galvanizers with some infantry models as well.

My plan was simple. Try to threaten him as much as possible to try and force out his Feat, then Jam him with the Kittens, while the rest of my army prepared to knock him out with my own Feat the next turn. So I ran everything up pretty much as far as possible to create as much threat as possible with the Ferox. Xerxis casts Def ward and Tac, Supremacy.


Convergence shuffles up a bit, being very cautious of the Ferox threat. Axiom drops a pod thingy that runs up to try and block a little.


I move a bit further up. The Ferox spreads out a bit, one of them running up to contest his Flag (A pointless effort really, he obviously kills it, the better play would probably be to keep him back with the rest. Oh well.


I have made a big mistake however. BB is just barelly within the Drag distance of the Prime Axiom, and with only one shield guard. If he manage to hit his boosted 7+ to hit, the big guy is probably out of the game, costing me one of my heaviest hitters. He manage to hit and the BB is pulled in, He fails to kill it, but the Fury i had Riled him with is stuck on him due to him being outside of Xerxis' control range. TEP kills the contesting Ferox and Lucant moves in to score. He forgets to pod however, so i score as well. 1-1.


I had hoped to draw out his Feat, but he keep holding it back, This means that if the Bronzeback pass his Threshold Check, now would be a perfect time for me to feat, since the BB together with the remaining Ferox should absolutelly demolish Prime Axiom when i Feat. BB, frenzies however, so there goes that plan..
I know that i need to stall him however, so Ferox will have to pull Jamming Duty. They jump in to deal a bit of damage to Prime Axiom, and contest. The rest of my army moves up to threaten him if he tries to move over to me. The Sentry positions himself so that he can charge me with his Inverter, which i hope he does. The Inverter cannot kill the Sentry on it's own, and on my Feat turn i should be able to kill both it and Prime Axiom, even under Lucant's Feat, taking out both of his heavy hitters. I move to 2-1


There's a big risk in this move however. If he manage to clear out all my jammers without activating the Prime Axiom, then he can charge in and probably kill both Tibbers and The Sentry, leaving me with nothing to take him down with. He tries to clear me with pretty much everything he has, even hitting Prime Axiom himself to transfer the left over Focus around his Jacks, but a singe Ferox is left standing. He tries to pull the Gladiator to him, but he misses one of his shots, the other is Shield Guarded. Lucant Feats, and the mechanics heal the damaged Axiom a little. The Inverter takes the bait and charge the Sentry, crippling his Spirit.
He forgets to pod me this turn as well, but i allow him to do it after his turn is over, because if he doesnt, i move to 3-2 and pretty much auto win next turn as the only model contesting the zone is the Inverter.

I forgot to take a picture after his turn, so this one is halfway into mine.

If i can manage to kill the Axiom, and Inverter, i will move to 4-3 ( There's pretty much nothing i can do to try and Contest him.) Meaning that all i will have to do is have as much models in the zone as possible to contest him, and win on scenario.
Zadeesh Rushes Tibbers and The Gladiator, Handlers enrage all three beasts Only one of them enters the zone however as i forget to position the rest in there). Xerxis Feats and kills the contesting pod, then repositions back to the flag. Tibbers Charge Prime Axiom, and my damage dice spikes a little bit, killing him (The damage he put on himself when trying to transfer the Focus around last turn did it, as i rolled excactly the amount of damage i needed to kill it). Sentry and Glad kill the Inverter and i move to 4-3.


He does his best to clear all my beasts, but he mess things up for himself. Even though the TEP kill the Sentry with a single shot (Quintuple Boxcars is apparently a thing..) and leaves the Gladiator on a single box, there's nothing he can do about the Beast Handler, apart from hitting it with the Diffuser shot which misses, and Lucant does not manage to kill Tibbers. All i have to do now is to kill the Galvanizer contesting my flag, which i do, and i move to 5-3 for the win!

Victory to the Titans!

Post Battle Thoughts

Definatelly a tough match, which ultimatelly boils down to who will get the Alpha. I believe i have an edge here, since the Ferox can Deal with pretty much anything themselves outside of Feat, and can Jam when he does. I need to play a bit more cautious though. The loss of BB this Early impacts how i play the rest of the Game. And the Ferox move T2 was pointless. It would have been much better to just keep them all back, to threaten him more in the later turns.

Monday 8 August 2016

007 - Xerxis1 vs. Reznik2

Third and final game of the day! A menoth playing friend of mine was at the club to play, but his opponent had to cancel due to a bad hangover. Me, being the thoughtful player i am, kindly offered to play him instead. We did the pairing process as if we were playing in a tournement for the practice. He had his Reznik list, and a mean looking Severius2 list with Judicator and stuff, that i really didn't want to play Makeda into. Xerxis on the other hand would love to face that list, and i believed he could play decently into Reznik, so i decided to give him a spin!

Lists:

My list
Tyrant Xerxis WB+28
 - Tiberion - 22
 - Bronzeback Titan - 18
 - Titan Sentry - 15
Tyrant Zaadesh - 4 (Proxied with Hexeris1)
 - Titan Gladiator - 14
Mortitheurge Willbreaker - 4
Pangiver beasthandlers min - 5
Max Praetorian Ferox - 21

His list:
Servath Reznik, Wrath of Ages WJ+29
 - Hierophant - 3
 - Reckoner - 16
 - Reckoner - 16
 - Scourge of Heresy - 16
Wrack - 1
Vassal Mechanik - 1
Allegiant of the Order of the Fist - 3
Nicia, Tear of Vengenace - 5
Choir of Menoth min - 4
Idrian Skirmishers max - 15
 - Idrian Skirmisher Chieftain - 5
Visgoth Juviah Rhoven & Honor Guards - 9
Daughters of the Flame - 10

Pre Battle Thoughts and Deployment:

My Xerxis list can probably play into this, it's just going to be hard. Reznik has threat extensions, a mean Feat, Spellpiercer, that basically just ignores any upkeeps i have (like Defenders Ward) and Lamentation makes Animi and stuff hard to use. Especially on my poor Fury 5 Warlock. With Daughters, Nicia and Idrians it's incredibly fast, and it packs quite a punch both in Shooting and in melee. I had some hopes thoguh. I can still Brick like a boss, surviving pretty much any kind of Alpha he throws at me by feating defensivelly. Hopefully, i would be able to get some offensive use out of the Feat as well.
We played the same map and Scenario as the last two games. He won the Roll off, and decided to go first. Deploying in a line stretching most of the table. I deployed with a heavy Skew towards the Left flag where the Wall, and house possibly could help me survive a bit. My hopes were to move over to the Left flag to score, while contesting in the middle and at the same time try to contest his flag. It would not be easy though as he had a lot of hard to get through elements to block my path. The Idrians Preyed my Bronzeback.
Let's go!


He runs everything up. Lamentation on Reznik, Death March on Daughters.


I move up to the left, hiding as much as possible behind the wall. This is a bad play i think, as i now don't have anything that can contest his flag, giving him a perfect opportunity to Score. I also expose the Ferox a bit too much. The change from Pretty much unkillable Ferox to just normal ones is kinda rough. Tactical Supremacy on Xerxis, Tag Team on Zaadesh.


Menoth just consolidate his hold on the Zone and Flag. Reznik moves in to score after giving Nicia Boundless Charge. I'm pretty lucky though, as all his Shooting and Nicia only manage to kill a Single Ferox, and take a few boxes off the Sentry. Daughters move to jam.


Realizing my mistake of having nothing to contest with, i need to try and do something. I decide to go all in, Trampling all i can into the Zone to try and take out as much as possible on my counter charge. I allready know he will get the Alpha, the problem is surviving it, so i have to Feat defensively. The gladiator walks up to Nicia, and Zadesh charge her. With Tag team up, hitting her is "Easy" and she goes down. The Ferox jump in to clear the Jammers and try to both block his Jacks, and set up for a contesting Run if they can survive. All three of Xerxis' beasts Trample into the Zone to contest and B2B for Feat purposes. Xerxis hugs the Wall and Feats.


I realize that i have made a mistake in the Ferox moves however. One of them is standing right in front of the Monk.. He can now activate, forfeit movement for the survivability ability thingy, and still get to punch a few cats to death, clearing the way for his Jacks, AND being ridicolously annoying to remove.. sigh.. Reznik Feats and everything moves in. I'm lucky again though, as he have to spend his Entire unit of Idrians to kill the Ferox hanging around my objective. (he rolls abysmally, and i tough like a god!) Which means that the Last Ferox lives! All of his Jacks charge in, dealing a bit of Damage to the Sentry, and just barely finishing off Tibbers.


Okay! we have both commited!, now i just need to kill as much as possible and contest. If i manage to kill all of his Jacks, i could still win this. Provided i contest ofcourse. Because if i don't, then he moves to 3-0, and only need to kill my objective on his next turn to win on Scenario. So the plan is this. Kill all three Jacks with my Beasts. Move Xerxis closer to the Beasts for Shield Guards and stuff (Maybe even killing some Idrians or something. Then move the last remaining Ferox in to score. Easy as Pie!
Zaadesh casts Rush on the Gladiator and moves closer so that he won't be out of control range. The gladiator Slams for free into one Reckoner. Knocking him into the other so that the Ferox is free to move, and so that the Jacks will be easier to hit. He buys four extra attacks and kills the first Reckoner. The sentry walks up to the next and starts punching. I roll pretty low on my damage rolls however, and he is left on one box. Which means that my Bronzeback will be Ashen Veiled when he moves in to kill Scourge. That's bad. However in a stroke of Genious, i come up with a plan! The Ferox haven't moved yet right? What if he just jumps over there and takes the last box off the Reckoner? With two attacks i should be able to roll the 7+ i need right?
So i ofcourse do this, then move the Bronzeback in and punch face to kill the last Jack! Yay!! Now all i have to do is... move the Ferox in to contest... damn.. Remember how i said it was absolutelly vital for me to contest this turn? Well.. guess who forgot completely about all of that and used the only model that could do that to finish off a crippled, knocked down jack, just because it was a fun thing to do? In the heat of the moment i even forget to activate Xerxis..


He struggles a bit as the Idrians still fail to do shit, but eventually my objective bites the Dust, and he moves to 5-0 for the Scenario win.


Victory to Menoth!


Post Battle Thoughts:

This match up is definatelly hard. Makeda2 would probably play WAY better into it, but then again, i feel that Xerxis is better into this list, than Makeda is into his Severius list i will have to try that match some time to see if i am correct. Anyways, i think it's definately playable. Another Scenario where it would be easier fror me to contest would help a lot too. In a straight up atrition grind, i think i am just a tiny bit up. Especially if i can snag T1. The biggest mistake i made here was to skew so hard to one side, allowing him to completely block me off from the flag he intended to score on. A better approach would have been to move everything up in the middle, allowing the beasts to move up in force to contest him. This would mean that Reznik could be forced to play an atrition game or risk getting assasinateed by angry elephants, and i'm much more comfortable in a game of atrition.

A great Game, and a great way to end a day of playing. My vacation is oficially ended as well, so i probably won't get the chance to play as often. My goal is still to get in at least one or two games every week.

Sunday 7 August 2016

006 - Makeda2 vs. Absylonia2

Following the first match, my opponent wanted to try something he was more comfortable with. Therefore he brought forth his tried and tested Abby2 list. I was on a roll, and dropped Makeda again, wanting to see how she would fare against the hyper agressive Legion list. Scenario and map were the same. Let's go!

Lists:

My list:
Supreme Archdomina Makeda WB+24
 - Titan Gladiator - 14
 - Titan Sentry - 15
Tyrant Radheim - 9
Morthieurge Willbreaker - 4
Tyrant Commander and Standard - 6
min Paingiver Beasthandlers - 5
Max Praetorian Ferox - 21
Objective: Fuel Cache

His List:
Absylonia, Daughter of Everblight WB+28
 - Proteus - 19
 - Raek - 8
 - Raek - 8
 - Ravagore - 19
 - Scythean - 18
 - Seraph - 14
Strider Deathstalker - 4
Spell Martyr - 1
Spell Martyr - 1
Blighted Nyss Shepherd - 1
Hellmouth - 6
Swamp Gobber Bellows Crew - 2

Pre Battle Thoughts and Deployment:

This list has a lot more for me to be careful about. His threat ranges are Much longer, he hits WAY harder, and he has easy access to Grievous Wounds from Proteus and Scythean. Those two beasts would have to be top priority, especially the Scythean, who would give Absylonia herself Grievous from it's animus. Abby2 have the "Alpha Hunter" ability that procs when she kills something. When she does, all her beasts gets +2 MAT and SPD. This combined with her Feat that gives Flight, 2" reach and +2STR to everything means that her list hits incredibly hard, and with long threat ranges to boot. Without Grievous wounds however, i can negate the ability with Stay Death, making it nigh impossible for her to use it.
We both deployed pretty much everything centrally (I won the Roll off, and decided to go first.) The Hellmouth went on his Right flank. (I forgot to take pictures after all my opponents turns this game, sorry!)
Let's go!


I move everything up the board. The left Ferox spread out a bit. I'm not sure what i was thinking here however. All of them are within the charge range of the Hellmouth Tentacles. This means that he can charge, make the 7+ to hit and drag me away, killing at least three guys unless i'm incredibly lucky with my tough rolls. To make matters worse, the Ferox on the Far right is outside of 10" from Makeda, meaning i can't Stay Death him. I think part of my plan was to make him spend all three tentacles right away, making the Hellmouth threat much smaller the rest of the game, but it's not even close to a fair trade..


He moves everything up a lot, knowing that he can cripple much of my alpha thanks to the hellmouth. Most of his beasts hide behind the wall, preparing to charge in no matter where i decide to move. The Hellmouth drags and kill three Ferox, while the Ravagore shoots and kills the one on the far right. Abby puts up Bracer on Proteus.

Ouch! I lost so much this turn, i'm at kind of a loss over what to do. My turn one mistake robbed me of so much momentum and hitting power. And allowed my opponent to move much further up the board than he would have dared to if i had played more safe with the Ferox, and moved everything right instead of straight forward. I figure that i just have to try and move in and do as much damage as possible and see where that takes me. Ferox charge/jump in to kill the Raek and try to Jam a little, they also do quite a few wounds on the Scythean as well. Only one of them gets tough as i use the other Willbreaker to give Radheim puppet master. Makeda gives him Storm Rager and he jumps in to finish the Scythean off. He's really exposed, but at least he's within Stay Death Range of Makeda and grants Dodge to most of the Ferox. The rest shuffles up.


Without Tough, and outside of Makeda's Stay Death range, the Ferox on the left are easy pickings for Abby, allowing her to proc Alpha Hunter. She moves in and kills both, and Feats. The hellmouth spawns a Tentacle and drags the Gladiator into the Charge range of Proteus, which moves in and kills it. The rest of his beasts finishes the rest of the Ferox, and knocks Radheim from his mount.

Even more destruction, and things are beginning to look even more desperate. His beasts are pretty full on Fury however, so i could be lucky and Frenzy a few of them. Makeda Feats and knock the Ravagore down with Prostration. Radheim cripple it's Spirit, and a beasthandler moves in to put an additional Fury on it. The Sentry Charge Proteus, but i roll misserably, doing very little damage (dice -4 because of Bracer and Unyelding..) and i do insignificant damage. Makeda moves into the cloud to be better protected from shooting and Spells, and the rest moves in to try and box her in so that he can't get to her as easily. One willbreaker gives her Tough as well, to try and help her survive.


I made the mistake of maxing the Sentry on Fury, leaving Makeda with no transfer Targets. This means that Abby should be perfectly capable of assassinating her. He goes for it, moving in both Spell Martyrs to cast boosted Hex Bolts on me. The Seraph Flares her as well and takes a few boxes. The Raek charge in to finish the job, only to fail! I'm left on a single box, the Deathstalker tries to finish the job, but being engaged and standing in a cloud, she fails to hit me. Proteus tries to take down the Sentry, but this time his Dice seems cursed, and he barelly scratch the angry titan!

Which means that my assassination run is underway! Believing that he could not fail the assassination, my opponent spent all his Fury, and didn't upkeep Bracer on Proteus. Willbreakers activates, giving Puppet master to both Makeda and the TyCom. Makeda casts Dash and boosts a Prostration on Proteus, knocking him down, and freeing the Sentry. The TyCom, charge Abby, leaving her on 6 boxes, then the Sentry tramples over to her, needing to hit on 9+ boosted and then roll a 4+ on the following damage roll to finish the job. I make the necessary rolls, and Abby goes down!


Victory to the Tyrants! 


Post Battle Thoughts:

The huge mistakes i made with my T1 moves should have cost me the game here. With the loss of so many Ferox that early, i lack the punch and survivability to grind him out, and even if i don't let him get the assassination opportunity, he will eventually grind me down and win on Scenario. However, this match proves that this list pretty much allways can pull off an assassination, provided i can make the right moves to set it up. I was lucky here though, first needing to hit Proteus in combat with Prostration, then i had to get the Sentry over to Abby, tanking a Free Strike from the Hellmouth (since Beasts dont benefit from Dash), and then i had to hit a boosted 9+ roll to hit her. But then again, it's allways satisfying to pull off far fetched assassination runs, even though i definatelly should have lost the game due to my mistakes early on, and even without those mistakes, it would have been a really tough fight.
 I also got to use a rarelly seen ability of the Beast Handlers by putting Fury on his beasts with their attacks. This was probably  the thing that tipped the scales in my favour actually, since the Ravagore  Frenzied (he would have passed the test had it not been for the Fury i put on him), and since he was knocked down he couldn't do anything but stand up. Had he passed the threshold check, he could have put an additional shot on Makeda, probably finishing her off.

Anyways, an interesting game, and a match-up i would love to play again sometime, to see how playable it is without my mistakes.

005 - Makeda2 vs. Vayl2

Got the chance to play a few games today, first of which was against Legion! He's testing out an experimental Vayl 2 list at the moment with an Archangel! I thought that to fight experimentals, why not use my own, so Makeda2 vs. Vayl2 it was. Who would get out ahead in this battle of Leading Ladies? Let's find out!

Lists:

My list:
Supreme Archdomina Makeda WB+24
 - Titan Gladiator - 14
 - Titan Sentry - 15
Tyrant Radheim - 9
Morthieurge Willbreaker - 4
Tyrant Commander and Standard - 6
min Paingiver Beasthandlers - 5
Max Praetorian Ferox - 21
Objective: Fuel Cache

His List:
Vayl, Consul of Everblight WB+28
 - Archangel - 37
 - Nephilim Bolt Thrower - 11
 - Raek - 8
 - Ravagore - 19
 - Seraph - 14
Strider Deathstalker - 4
Hellmouth - 6

Pre Battle Thoughts and Deployment:

So, what to think about this? Luckilly for me, i played a game against this list a few weeks ago, that time with a pXerxis list that's basically a cross between my current pXerxis list, and my Mak2 list. I came out on top in that one after a single Ferox One shotted Vayl in a crazy assassination run that i only attempted because my opponent had to leave. The list isn't expecially fast. At least not compared to my own.. His shooting can be a real pain, but without any kind of tools to negate Tough/Stay Death, it shouldn't worry me too much. The Hellmouth is a whole different story however. It can pull models out of formation, or within threatranges of his other stuff. And it also allows him to drop spells into my Deployment Zone before i even get the chance to move. I would have to be careful about that.
We played Recon, He won the roll off, and decided to go first. He deployed Archangel and Raek on my right flank, while Vayl and the rest stood opposite the other flag. Deathstalkers on wither flank, while the Hellmouth (Proxied by a cav model and three Ogryns) hid behind the House.
I deployed centrally with Ferox on either flank, the plan was to be able to shift to whatever side he decided to go for, move in to score and force him to commit. With the survivability and mobility of my list i were pretty sure that i could push him back and begin to Score in my T2 on the side he decided to go for. In doing so, he would have problems scoring as he basically has no way to block my Ferox, and Vayl would be far to exposed if she tried to shift over to the other Flag. Either that, or just not do anything herself, and i pretty much consider that a win anyway, as she's one of the primary problems i have to deal with in his list.


He moves everything up the board. One Deathstalker shoots a Hellmouth Tentacle, the Hellmouth activates, the new tentacle it can place much further up the board runs so that it is within 8" of two of my Ferox. Vayl activates, Shoots the Tentacle and throws two Chastens on my un-Toughed Ferox, forcing me to use two Fury to keep them alive, Meaning i have to cut myself for Fury T1!


I move up a bit, following my plan to shuffle to the side he has Vayl on. Most of my guys hide behind the Wall for the DEF buff against his shooting. I take care to place the Sentry within 3" of all the left Ferox for SHield Guard purposes, while still being far enough away from everything that if he takes an AOE from one of his shooters only he will be hit. I opt Not to kill the Tentacle (the barelly visible proxy base on the top left of the Wall in the picture above). What this means is that he have to take a free strike to move it away, which he wants to do as it's engaging three of my cats, making channeling from it impossible, and meaning that the Deathstalker that really wants to try and kill a few cats will have a hard time hitting anything. Radheim hides behind the Woods, waiting there in safety until i need him. This also means that it's much harder for my opponent to move his left flank elements over since that means that they will have to enter my threatranges on the way.


He moves up a bit to contest the flag in as many places as possible, then starts shooting. At the end of this, all but one of the Ferox is down to one box. All his AOE's were targeting the Ferox on the right, so when the Deathstalker on the left flank activated (The last model to do so) and moved up to try and kill a few Feroxes (Makeda was all out of Fury at this point) i Shieldguarded that insted, Stranding the damn solo right next to my lines.


The plan is simple now. Remove everything that contests, and then move in to do as much damage as possible and Jam with the rest, then set up for a countercharge after he commits next turn. He held back his Feat last round, so i know that it's gonna happen in his next round. A Ferox dies to Continous fire from the Archangels shot, i decide that it's not that important to keep it alive, and instead keep all my Fury. The Left Ferox activates first, clearing out all the contestors, then reposition to block his path to the FLag. The other unit swopps in and put quite a bit of damage on the Ravagore and Seraph, then jam him up. Makeda runs to the Flag, and the rest of my Army just shuffle a bit to set up for my Next turn.


He tries to see if he can do anything but commiting, but decide that there's nothing else he can do. Vayl is in a terribly exposed position, and have no easy way over to the other flag. I have a few Ferox in the Zone, and if he decides to try and Score there, he's within range of pretty much everything i have anyway, so there's no point in holding back. He Feats with Vayl, doing some damage that i negate with Stay Death and Tough. Everything he has left commits and kills all but three of the Ferox and one of the Willbreakers. A tentacle contests my flag.


He's played right into my hands and i finally commit everything. Makeda Feats and cast Storm Rager on one of the Ferox. The two enraged Titans move in and kill the Archangel, Radheim and the Tycom charge the Raek+Deathstalker in the trench, killing the latter and leaving the Raek on a single Box (Radheim was just outside of my Feat and failed to roll the 5+ needed to hit the Raek in the back), The Ferox activates and finishes off the Seraph (The Storm ragered one rolling triple boxcars on his charge attack!) and dents the Ravagore even further, leaving it with a crippled Body aspect, and kills the contesting Hellmouth Tentacle.


With pretty much his entire army gone, and the rest locked down by Ferox, my opponent concedes.

Victory to the Tyrants!


Post Battle Thoughts:

Looking back, i don't think there's much my opponent could do differently here. No matter which side ha chose to go for i could pull off the excatct same moves, blocking him out and strike back to cripple him. Granted, My damage dice were on fire this game, but even with average rolls, i should be good here. His list just don't have the damage output to get through the wall of Ferox without committing heavilly in meele, and in doing so, exposing himself to my countercharges. He even got thae maximum shots possible from his beasts, and a few spells from Vayl, and the only reason i actually lost a Ferox to all that shooting is because i decided not to use Stay Death on a Fire continous roll.
The versatility, mobility and incredible survivability of this list continues to impress me. I still haven't had a single match where i fell it's unplayable. I'm looking forward to testing it more!

Saturday 6 August 2016

004 - Makeda2 vs. Thyra, Rematch

The first match ended so quickly, we decided to try again. This time with me going first to see how much that would impact the game. Let's find out!

My list:

Supreme Archdomina Makeda WB+24
 - Titan Gladiator - 14
 - Titan Sentry - 15
Tyrant Radheim - 9
Morthieurge Willbreaker - 4
Tyrant Commander and Standard - 6
min Paingiver Beasthandlers - 5
Max Praetorian Ferox - 21
Objective: Fuel Cache

His list:

Thyra, Flame of Sorrow WJ+29
 - Hierophant - 3
 - Blood of Martyrs - 16
 - Dervish - 7
 - Scourge of Heresy - 16
Avatar of Menoth - 20
Wrack - 1
Vassal of Menoth - 3
The Covenant of Menoth - 4
Allegiant of the Order of the Fist - 3
Choir of Menoth min - 4
Daughters of the Flame - 10
Flame Bringers max - 17

Pre battle thoughts and Deployment:

I had learned my lesson this time around. He can deal a severe blow to me if i'm not careful. He opts to switch sides, not wanting the forest  in the middle to block his Jacks. I deploy a bit more spread out so that my beasts won't have to run through the damn thing. He deploys pretty much excactly the same as last time. Game on!


I run everything as far up the board as i can, taking care to not let him get off any charges.


He spends a lot of time trying to figure out what to do. He opts to advance a bit, leaving the monk guy up front with the Daughters as a screen.


I think it's pretty clear what i have to do here. Feat and jam my cav down his throat to block him out while trying to kill as much as possible. Makeda activates and Feats, both Ferox units jump in, clearing out all the Daughters and the Monk. Unfortunately i flop a bit on my damage rolls against the cavalry and only manage to kill one of them. I reposition to jam and block him as much as possible and moves up the rest of my army behind the cats.


I think my opponent spends about 15 minutes just thinking about what to do here. He eventually decides to Feat and cast Carnage. The cavalry charge in and try to deal some damage to my cats to clear the way for Avatar. Turns out i made a huge mistake as i left the Gladiator Just barely within the threat of the big guy. Luckily for me he miss with one of his attacks, allowing me to dodge out of the way and try to Jam the avatar a bit more. After this my opponent takes even more time to think, before deciding to send in Blood of Martyrs to clear the Jammers out (He had initially hoped to use him to clear out the left unit of Ferox.) Avatar charge the Gladiator, killing it with Focus to spare, and kills another Cat. Scourge and the Dervish kills one cat on my left Flank.


Ouch! Loosing the Gladiator means that my means to deal with his Heavies just went down drastically. In addition, almost all of the Ferox are dead. Things does not look to good for me, but my opponent is down to about a minute and a half on his clock, so i'm almost guaranteed to win. Nevertheless, we decide to finish the game anyways. The left Ferox and the Sentry takes out the Scourge of Heresy. Radheim, the last remaining Ferox on the Right and the TyCom try to cripple the Blood of Martyrs, but i roll misserably and does pretty much no damage. Makeda runs over to the Flag to Score and camp all six Fury.


Avatar moves in to kill the Sentry, The cav kills Radheim, The Tycom and the last remaining Ferox on the right. Blood of Martyrs charge the cavalry blocking the Dervish and kills them, allowing the little guy to calmly walk over to Makeda and bonk her on the head for the Assasination win.

Victory to all!

Post Battle thoughts:

Getting the first turn makes a huge difference here, and if i hadn't made the mistake of letting him get to the Gladiator, i believe i could and should have won this game. Both my heavies were perfectly positioned to charge in, probably killing two of his heavies and cripple his ability to deal significant damage to me. I really need to stop making these silly positioning errors. With the ability to pre-measure everything mistakes like that generally shouldn't be made.

003 - Makeda2 vs. Thyra

Following the two interesting games vs. Cryx i was offered the chance to play against a Menoth player that arrived just as i was about to leave. He wanted to test his Thyra list, and seeing that i had allready gotten two good games with Makeda i decided to give her another go. Because we're lazy we decided to use the same map and terrain as the table was ready to go.

My list:

Supreme Archdomina Makeda WB+24
 - Titan Gladiator - 14
 - Titan Sentry - 15
Tyrant Radheim - 9
Morthieurge Willbreaker - 4
Tyrant Commander and Standard - 6
min Paingiver Beasthandlers - 5
Max Praetorian Ferox - 21
Objective: Fuel Cache

His list:

Thyra, Flame of Sorrow WJ+29
 - Hierophant - 3
 - Blood of Martyrs - 16
 - Dervish - 7
 - Scourge of Heresy - 16
Avatar of Menoth - 20
Wrack - 1
Vassal of Menoth - 3
The Covenant of Menoth - 4
Allegiant of the Order of the Fist - 3
Choir of Menoth min - 4
Daughters of the Flame - 10
Flame Bringers max - 17

Pre Battle thoughts and deployment:

So, several elements with Grievous wounds, and even more that negates Tough. Combine that with long threatranges, a Feat that boost those even more, and several hardhitting, heavy armoured Jacks, and it looks like Makeda have quite a match on her hands. Getting to and destroying as much of his fast elements AND the Blood of Martyrs would have to be a top priority here. As i very often find with this list, getting rid of the few elements that really threatens me is usually enough. All i need to do is buy myself enough time to get my Heavy hitters intact to the fight, or to block the opponent out on scenario.
The Allegiant can be a massive pain in the ass. Another friend of mine have fielded him extensivelly against me. He rarelly does much work, but he is ridicolously hard to remove. For those that don't know him. He have an ability that he can use if he forfeits either movement or Combat action, that makes him DEF 18, If you miss him he can make a full advance, Every time.. He's also Steady and Tough. He contests flags or Zones like a champ, all by himself and without any access to MAT buffs he can keep going at it all day.
He wins the roll off and decides to go first. A smart move against me i believe. He Skewes hard right with all his jacks and the daughters, The cav on the other flank. I Adopt my usual central deployment and we're good to go!


He moves everything up, trying to tempt me into making an overly agressive move with Ferox. Silence of Death is Thrown up on the Cav, and Thyra casts her teleport upkeep.


I move forward, trying to tempt him into comitting with his faster elements and use his Feat. Storm Rager on Radheim. 


I fail to realize however, just how much damage his Cavalry can do to me. He Feats i believe, cast Carnage and charges me with the two horses that can get to me, and they kill 4! Ferox. The Daughters run to jam me a little, and he moves up with the rest to hide behind the Fence.


I spend a few minutes trying to think of an opening here. As i see it i have two options. My opponent thought Thyra safe in her current position and didn't use her Teleport. This means that i can Get Radheim and a couple of Ferox to her. All i have to do is to kill the three Cavalry models that stand in Radheims way, run and Jump him in with Puppetmaster and hit with my two attacks. Thyra is camping 1 Focus, so if i hit on both attacks i should be able to bring her down. I can also manage to get two Ferox from the left unit in for a Combined Melee attack to do some extra damage beforehand, My opponent forgot to place her within 1" of the fence and therefore won't get any benefit from standing behind it.
My other option is to try the long game, Moving everything to the left, possibly knocking out a system or two on the Blood of Martyrs, then use Ferox to jam him up on one side of the fence while i try to move in and Score. Since he have no access to pathfinder for his Jacks, he can't charge over the fence, so by positioning the Ferox to block he have to use at least one turn to remove them before getting over there, allowing me to set up my beasts for a charge, while also moving in to score.

I decide to go for the assasination. I should have a really good chance with puppetmaster on both the Ferox and Radheim with Feat, and there's too many things that can go wrong with the other plan.

Makeda Activates, Feats and cast Dash. The Tyrant gives his speed buff to Radheim, The Sentry moves to clearthe two Horses directly in front of Radheim. The Left Ferox unit activates, rund around the Daughters and kill the Horse that stands in front of Thyra. Two of them Combine to do 4-5 damage to Thyra. Radheim jumps in and barelly finishes the job ( i rolled horribly terribly low on the pounce attack, and had to use Puppetmaster to get a high enough roll on the Armour Piercing one)

The white Proxy base in the middle is Radheim, the Blue one right next to it is the Ferox i used to kill his Cav model.


Victory to the Tyrants!

Failing to realize just how much his cav could do nearly cost me the game here. The fact that he gets to go first severely limits my options as he can get pretty high up the board and threaten me before i even get to do anything (Guess that's how it feels to play against my own list..). Luckilly he fails to realize just how powerfull my assassination angles are. True, a lot of things had to go my way for it to work, but on average dice i should be good to go here at least 3 out of 5 times.

Friday 5 August 2016

002 - Makeda2 vs Skarre1

Following his crushing defeat with Skarre2, my opponent wanted to see if his Skarre1 list would fare any better. This is a very different kind of list, much faster and with Grievous wounds-toting Stalkers it would prove to be a much tougher match for our Supreme Archdomina! We decided to play the excact same scenario and map to see just how much the list change would affect the game.

Lists:

My list:
Supreme Archdomina Makeda WB+24
 - Titan Gladiator - 14
 - Titan Sentry - 15
Tyrant Radheim - 9
Morthieurge Willbreaker - 4
Tyrant Commander and Standard - 6
min Paingiver Beasthandlers - 5
Max Praetorian Ferox - 21
Objective: Fuel Cache

His List:
Pirate Queen Skarre WJ+28
 - Skarlock Thrall - 4
 - Kraken - 36
Aiakos, Scourge of the Meridius - 4
 - Stalker - 8
 - Stalker - 8
Warwitch Siren - 4
Necrotech - 2
Soul Trapper - 1
Scrap Thrall - 2
Ragman - 4
Soulhunters min - 11
Satyxis Raiders max - 16
 - Satyxis Radier Sea Witch - 3

Pre Battle Thoughts and deployment:

I got to go first again which i believe is very important in this match. The Stalkkers can put so much hurt on my ferox, and on feat turn they can pretty much take out one beast each. While being pretty safe from my retaliation.  Mtop priority was then to get these two out of the game as quick as possible, to be able to play the same atrition game that won me the last battle. I deploy centrally again. My opponent have learned from last game and place the Kraken more centrally along with most of his army. Soulhunters on my left, Raiders on my right. 
Game on!

I move everything up. Makes sure that i'm outside of the stalkers threatranges.  I make a small mistake however when i forget to cast Storm Rager on Radheim. With that one up, he can easily take out a stalker on his own, even having the possibility to do it on Skarre's Feat Turn, which could be quite essential in this game. 


Cryx advances. He takes care to position his stalkers so that i can't really hurt them, while still making it really hard for me to contest either flag, as they can leap in no matter where i position myself. 


I'm faced with a tough choice here. I can either try to skew to one of the flags, trying to deal some damage and hopefully managing to survive his Alpha with enough guys to fight back after. Or i can hang back, try to avoid the offensive part of his Feat, letting him score on both flags, but forcing him to commit hopefully both stalkers to do so. The problem with the first option is that no matter which of the two flags i choose, he can get at least one stalker in to rid me of Tough and stay death, and the sheer volume of attacks he can pull off will leave me severely weakened no matter what. So i go for the second option. Moving slightly forward and to the right. One cat contesting each flag. 
I make two HUGE mistakes however. Firstly i forget to measure if the left contester is outside of the Soulhunters threat. and i move the rest of the left unit a few millimetres too far forward, meaning that the Kraken can get into meelee with three of them. Then i decide to cast Storm Rager on Radheim, so that i can upkeep it next round when i expect to commit him to kill one of the stalkers.  The problem however is that this leaves me on only 3 Fury for Stay Death Purposes, which would have been fine if had done my measurements better, but with the amount of atacks he can get in, i'm in deep trouble.


My opponent sees his opportunity and takes it. Skarre Feats on herself, both Stalkers and the Kraken, casts dark Guidance and moves into a better position. The Raiders charge my right contester and forces me to spend two fury to keep it alive ( i want it to live to force him to trade his Stalker for it if he wants to score.) I now only have a single Fury left, and the soulhunters strike, killing the left contester and moving in to score. The right Stalker kill my right contester. The Kraken then activates and charge in. I'm lucky and make a few tough rolls, so he "only" manage to kill two Ferox. This means that his second stalker can hang back and chill for another turn.

I forgot to take a picture after his turn, sorry!

Ouch! I'm not really left with too many options here. My left flank is decimated, and he's standing pretty strong over on that flank with a Stalker, the Kraken and the Soulhunters. Skarre herself is also in a position to charge over there and some damage. Realizing that flank is lost i instead turn my focus to the right flank. If i can kill the Stalker and Raiders, i can start scoring myself, putting some pressure on Skarre. Then all i have to do is contest his flag, survive the next turn and then kill the remaining Stalker and the Kraken. That should be doable right?
I really want makeda to help out clearing the Raiders, but she's unfortunatelly blocked in, and i need to activate either the Ferox, or the Gladiator first to fre her, and both of them really wants the feat so that they can hit the raiders more easily. So instead i activate the Tyrant, giving her Push to the Limit, and them move her to a safe position on the right and feats. The right unit of Ferox then proceeds to jump in and kill 7 raiders. I brainfart however, and the remaining 4 is out of the gladiator's reach. Radheim charge the Stalker and one shots it. The Gladiator moves over to Makeda to get away from the Kraken. There's pretty much no way for me to get the Sentry to safety without leaving him completely out of the game, so i move him over tostand a bit in the way. In hindsight, i probably should have moved him in to contest the flag as well.  The two remaining ferox on the left charge the soulhunters and kills two, then repositions to contest and try to stand a bit in the way.


Skarre charges the closest Ferox and murders it. The Stalker jumps in and kill two Ferox, and the The remaining soulhunter charge the last Contesting Ferox and repositions a bit to threaten my objective, then goes incorporeal. The Kraken kills the Sentry, but leave the Objective alone (had he destroyed that instead he would have moved to 4-0 leaving me with severe troubles the following turn.)


My options getting more and more limited, i move to kill the Kraken. The Gladiator, Tyrant and Radheim does this perfectly well. The last remaing Ferox kills a couple more Raiders and puts a small dent in the Stalker. Willbreaker Runs over to contest. "All" i have to do now is have my objective survive his next turn, and i should be good to go.


However, Skarre have different plans. She gets six extra focus from Ritual Sacrifice, kills the Willbreaker, then Boosts two Hellfires onto the objective. She rolls way above average on the damage, and my objective goes down, letting her move to 5-0 for the Scenario win

Victory to Cryx!

Post Battle thoughts:
The mistakes i made in my second turn clearly cost me the game here. With the added Fury to keep things alive, forcing him to commit both Stalkers, and with two more Ferox on the left flank, i should be much more capable to play for atrition. My opponent played really well here, even though he didn't go for the T3 attack on my Objective to close out the game even easier, he had pretty good control on the match. The Match-Up is most definatelly playable, as long as i keep myself from making simple mistakes like i did here.